Set or Change Event Location
Set Event Location
Events that have been declared on the map will have a location specified in the Primary Details tab of the Event Details window. See section Declare Events on Map .
Events that have been declared through the Action Panel or one of the event lists, require a location to be set prior to saving the event record. See sections Declare Events on Map and Declare Events on Map for more details on declaring events through the Action Panel or event lists.
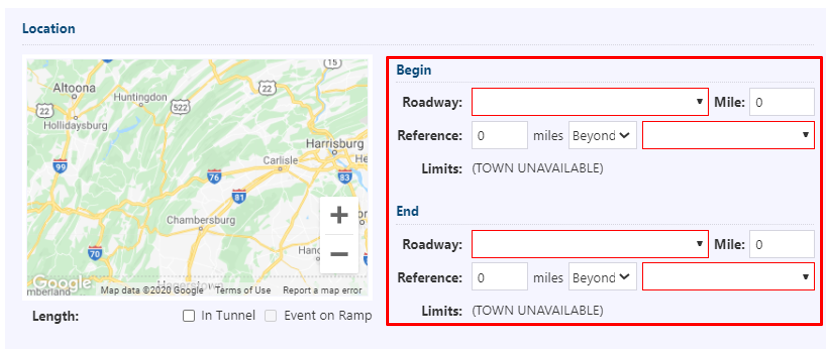
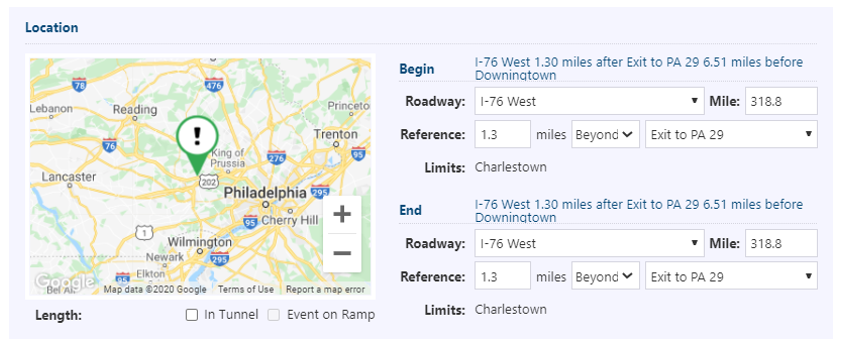
To set the primary/Begin location of the event, select the appropriate Roadway from the dropdown list and the nearest reference point. An Event icon will appear in the map view, placed at the selected exit. Location description, mile marker (Mile), and Limits will populate to reflect the selected location.
You can modify the position of the event by changing its distance from the selected reference point.
You can also set the location of the event using the Mile input. Instead of selecting a reference point or modifying the location using the distance from the reference point, you can specify the mile (down to 1/10th of a mile) the event is located at. The ATMS will automatically populate the nearest reference point and other location details based on the specified mile.
If the event has an End location, and it has either not been set, or is the same as the Begin location, the End location will automatically update to match the Begin location.
The following event types can have a linear segment:
- Incident
- Congestion
- Planned
Event icon will appear on the main map after event record is saved. See event type-specific event management sections below for more details.
Set Event End Location
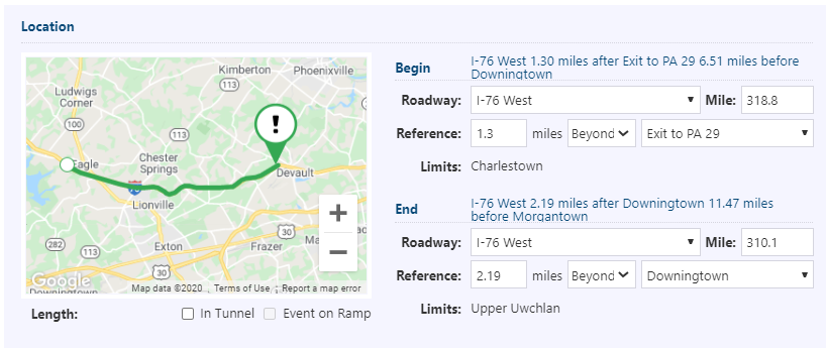
You can use the end location of the event to specify linear events. Select a roadway for the end location (if different from the head location) and specify either a mile marker, or its distance from a reference point on the road. The ATMS will show the extent of the event using a line between the specified head and tail.
Change Event Location
The event location can be changed in two ways: by clicking and dragging to move the icon on the map, or by updating the roadway, reference location, distance from reference location and/or chainage point in the Primary Details tab of the Event Details window.
Change Event Location on Map
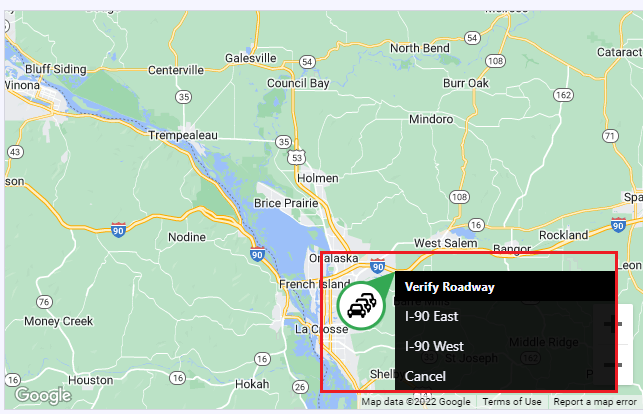
Change location of an event on map by clicking and dragging the icon to a new location. The Verify Roadway window will appear, requesting confirmation on the new roadway and direction of the event. Select roadway and direction. Click Ok.
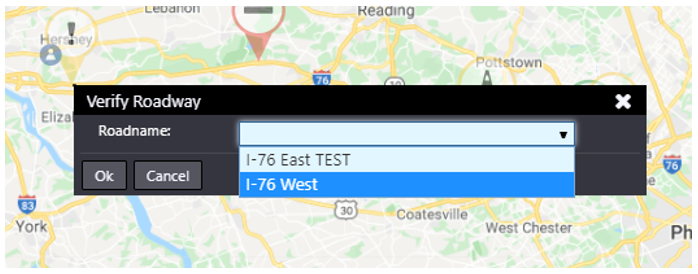
The Verify Roadway window will expand include the new event location details. Click on the button that applies.
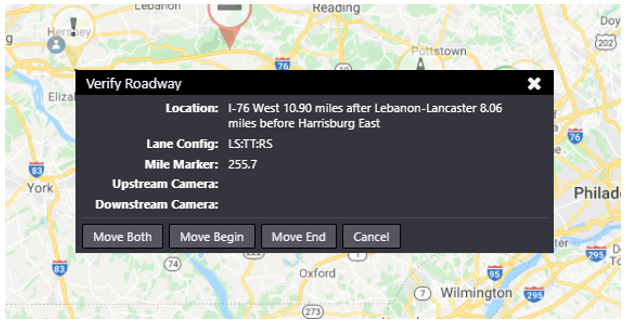
Move Both: clicking this button will move the head and tail of the event. If you are moving an event without a linear component, you will have to click this button. If you would like to maintain the length of the linear segment at the new location for a linear event, also click this button.
Move Begin: clicking this button will move the beginning point of the event to the new location, but will keep the end of the event at the previously defined location. Note that if the event did not previously include a linear segment or End, one will be added, with the end being the previous location of the icon. If the event did have an end defined, the end point will remain at the same location.
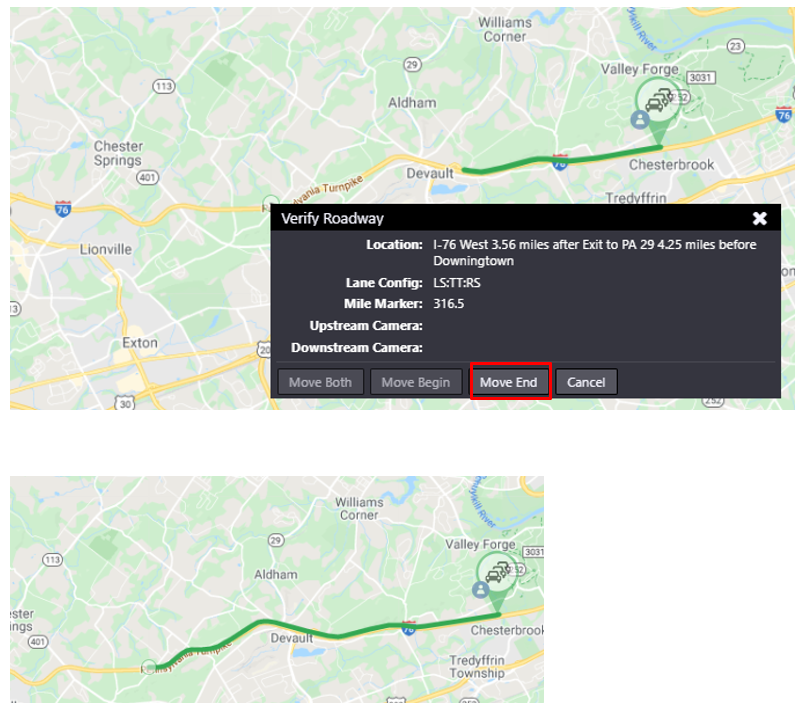
Move End: clicking this button will move the end of the event to the new location. If an end previously did not exist, an end will be added at the new location. Note that the End must be upstream of the event.
Depending on the type of event or whether you are moving the Begin or End of the event, the availability of these buttons will vary.
Change Event End Location on Map
Change the location of an event end on the map by clicking and dragging the end to a new location. The Verify Roadway window will appear, requesting confirmation on the new roadway and direction of the tail end. Select roadway and direction. Click Ok.
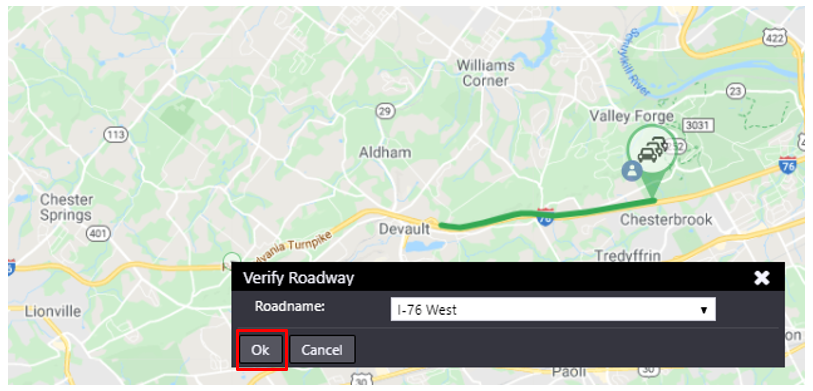
The Verify Roadway window expand include new event location details. Click on the Move End button to complete moving the tail location of the event.
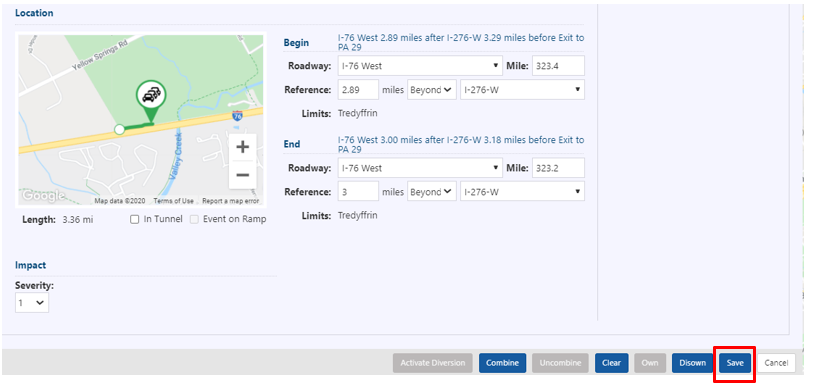
Change Location through Event Details
You can update the Event location using any combination of Roadway, Mile marker, or Reference in the Primary Details tab of the Event Details window. Event begin and/or end will update to reflect the new location in the map preview. Click Save to complete the change.
Set Multiple Location
Events declared through Action Panel can add Multiple Location but clicking on Add Location button. The selected location will appear bigger than others.
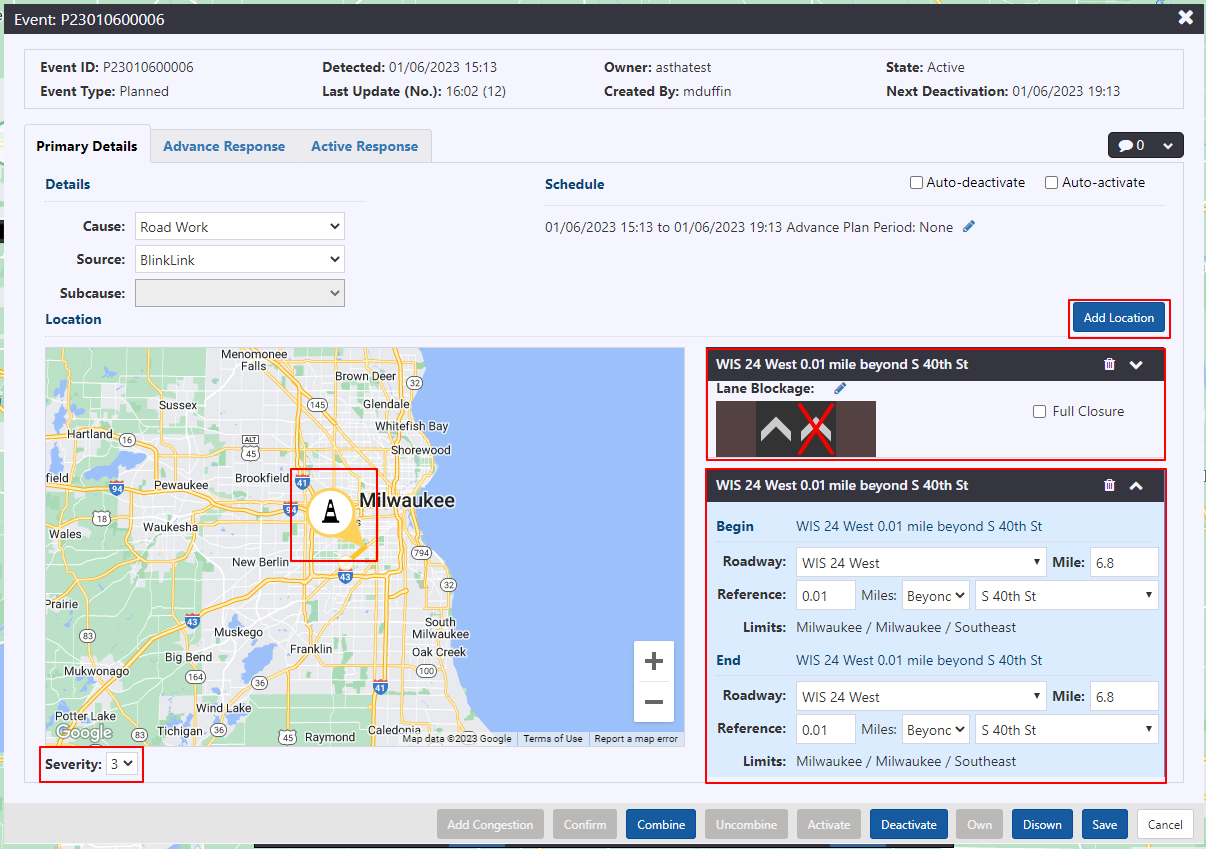
Severity will be common for all the events.
Change the location of the added event by dragging the location of the event.
Set Location for Weather Events
Setting location for Weather events is described in section Manage a Weather Event
Event Notification Location
ATMS event notifications that currently contain location descriptions based on the event's distance from nearby reference locations will be updated to show the event mileposts instead. This may be limited to notifications generated by updates from the Construction and Maintenance application. Mileposts will be presented in the following formats:
| EVENT LOCATION | FORMAT | EXAMPLE |
|---|---|---|
| Single point | Roadway name (milepost) | I-76 East (112.6) |
| Begin and End on Same Roadway | Roadway name (begin milepost to end milepost) | I-76 West (310.2 to 308.4) |
| Begin and End on Different Roadways | Begin roadway name (begin milepost) to end roadway name (end milepost) | I-76 East (335.1) to I-276 East (326.1) |