Manage a Diversion Event
A diversion event plans a diversion route due to a specific cause. If it is unplanned, it is usually a roadway incident. If it is planned, then it may be scheduled maintenance, roadwork, or something similar.
Declare an Unplanned Diversion Event
To declare an unplanned diversion event, add a diversion event as described in section Add an Event . Make sure to select 'Diversion', not 'Planned Diversion'. Then select the diversion route in the pop-up window 'Select Diversion Route'.
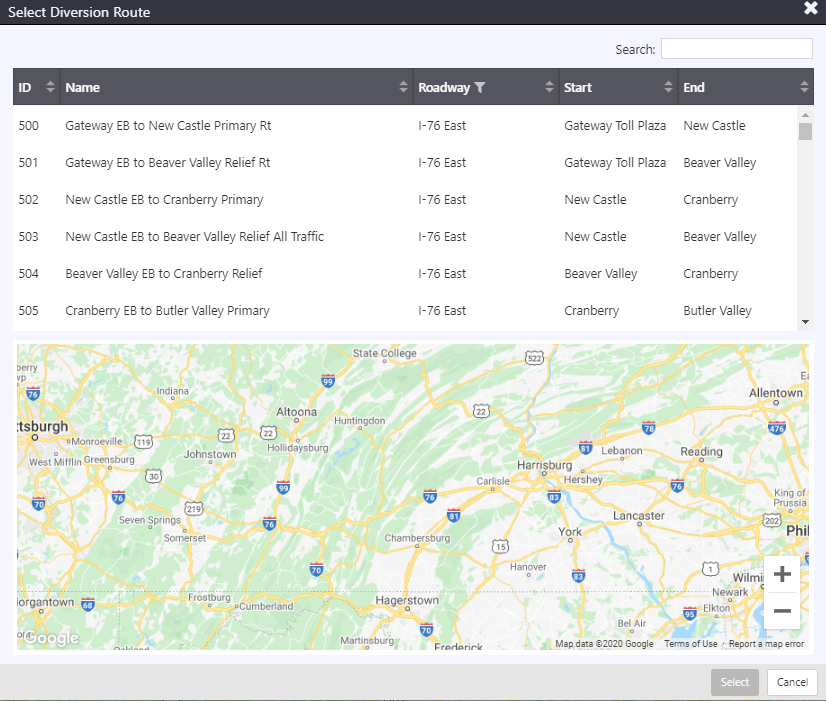
After entering the diversion route, finish filling in the event details in the Event Details window next.
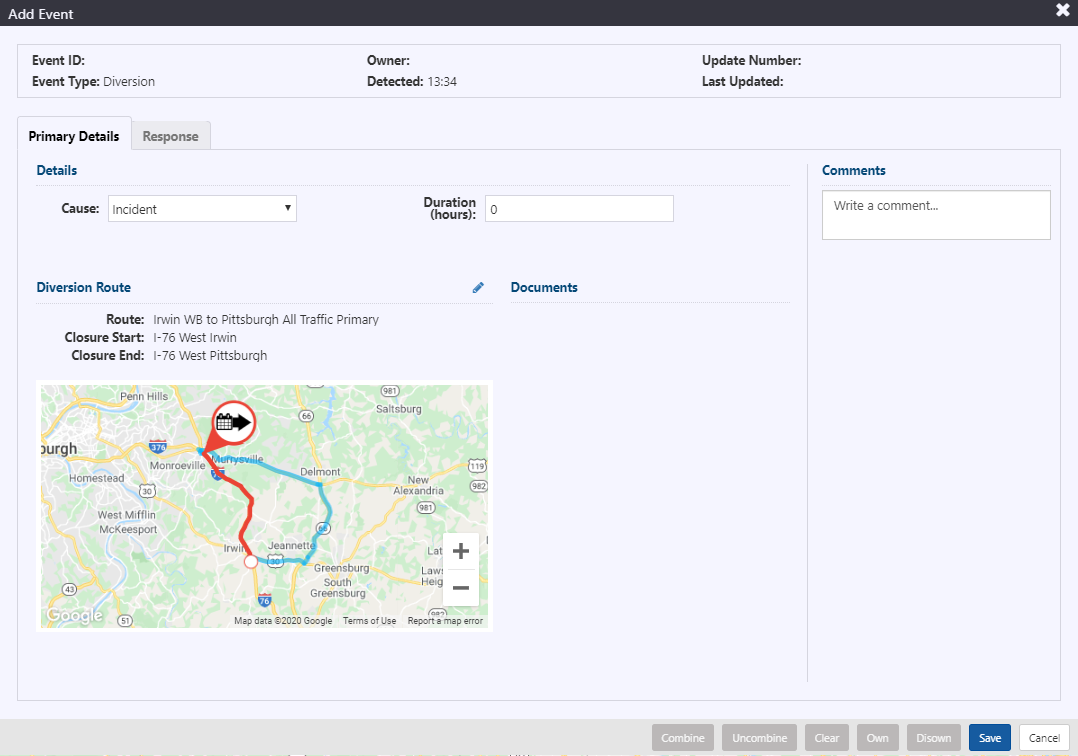
:::note
Detected time in the header is the time the event was declared in the ATMS.
:::
Include the following information within the Details area of the Primary Details tab:
- Cause: the specific cause of the diversion event
- Duration: the length of time (in hours) that the diversion route is predicted to last for
Click the Save button located at the bottom of the Event Details window. The diversion event record will be created. The header of the Event Details window will update to include Event ID, Owner, Update Number and Last Updated time.
Response plan will be generated and available for posting, as indicated by a blue banner in the Event Details window and a notification in the notification panel. For more information on response plans, see section Manage Event Response Plan.
Activate a Diversion From Another Event
From the Event Details windows of a pre-existing event, it is possible to create a diversion at that event location. Click the Activate Diversion button at the bottom row of the window.
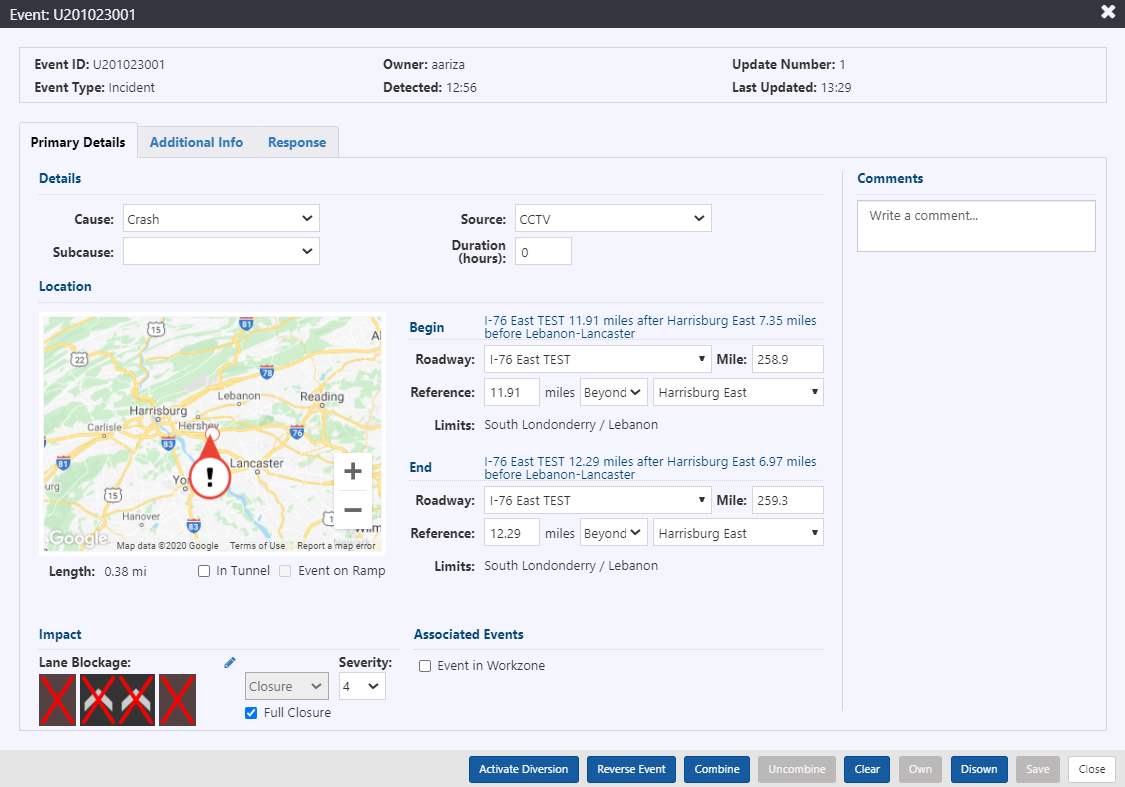
The 'Select Diversion Route' window will pop up. Select a diversion route then click Select.
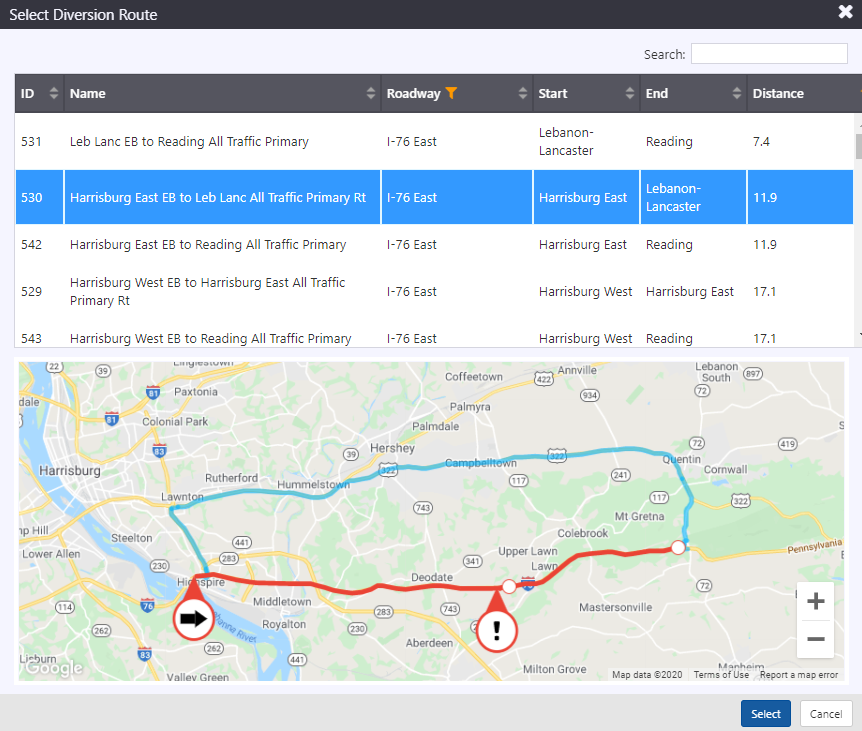
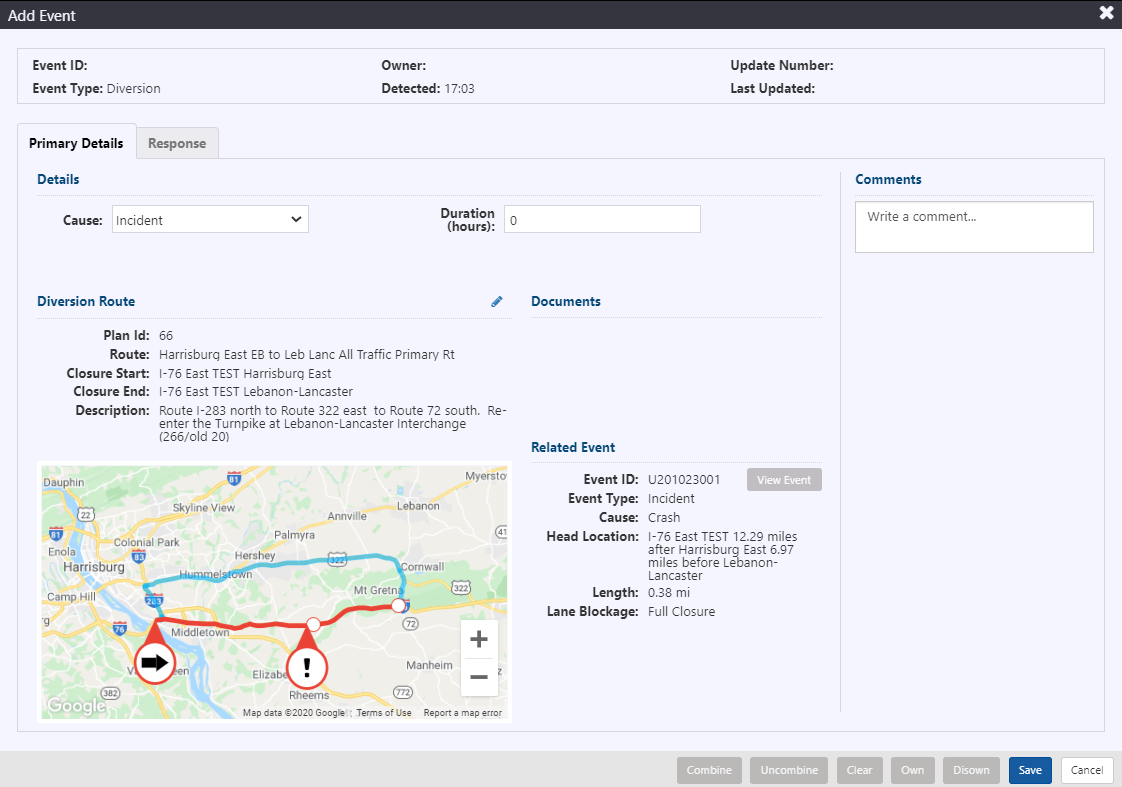
Finish filling in the diversion route details in the Event Details window pop-up.
:::note
Detected time in the header is the time the event was declared in the ATMS.
:::
Include the following information within the Details area of the Primary Details tab:
- Cause: the specific cause of the diversion event
- Duration: the length of time (in hours) that the diversion route is predicted to last for
- Show Source Event: check the box below the Diversion Route map to toggle the Source Event pin on the map
Click the Save button located at the bottom of the Event Details window. The diversion event record will be created. The header of the Event Details window will update to include Event ID, Owner, Update Number and Last Updated time.
Response plan will be generated and available for posting, as indicated by a blue banner in the Event Details window and a notification in the notification panel. For more information on response plans, see section Manage Event Response Plan.
Clear an Unscheduled Diversion Event
Unscheduled diversion events can be cleared from the map by either clicking Clear through the Event Details window or right clicking the event icon, as described in section Clear an Event.
Schedule a Planned Diversion Event
To schedule a planned diversion event, add a planned diversion event as described in section Add an Event . Make sure to select 'Planned Diversion', not 'Diversion'. Then select the diversion route in the pop-up window 'Select Diversion Route'.
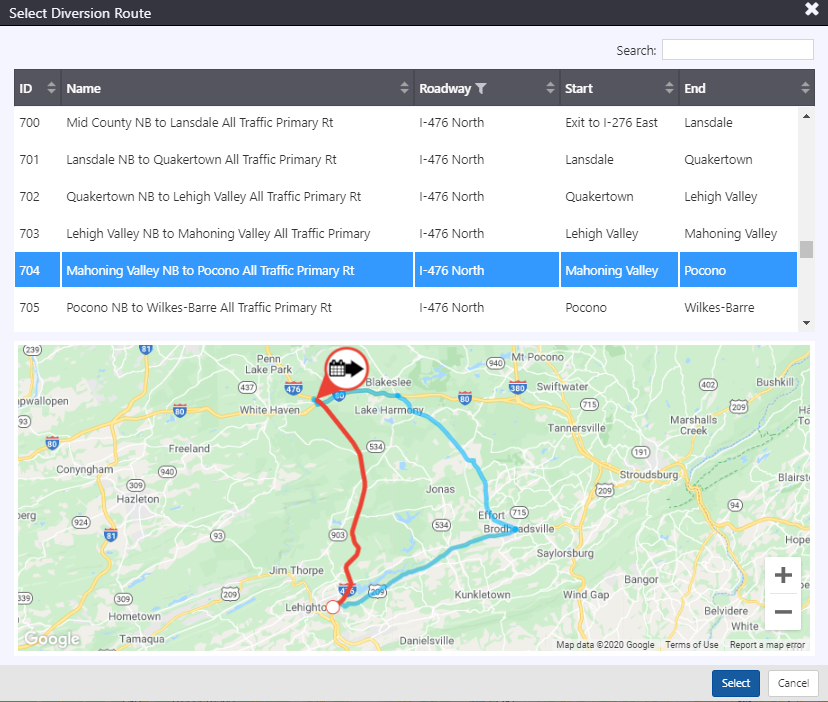
After selecting the diversion route from the list, click the Select button. The next window will be the Event Details window.
:::note
Detected time in the header is the time the event was declared in the ATMS.
:::
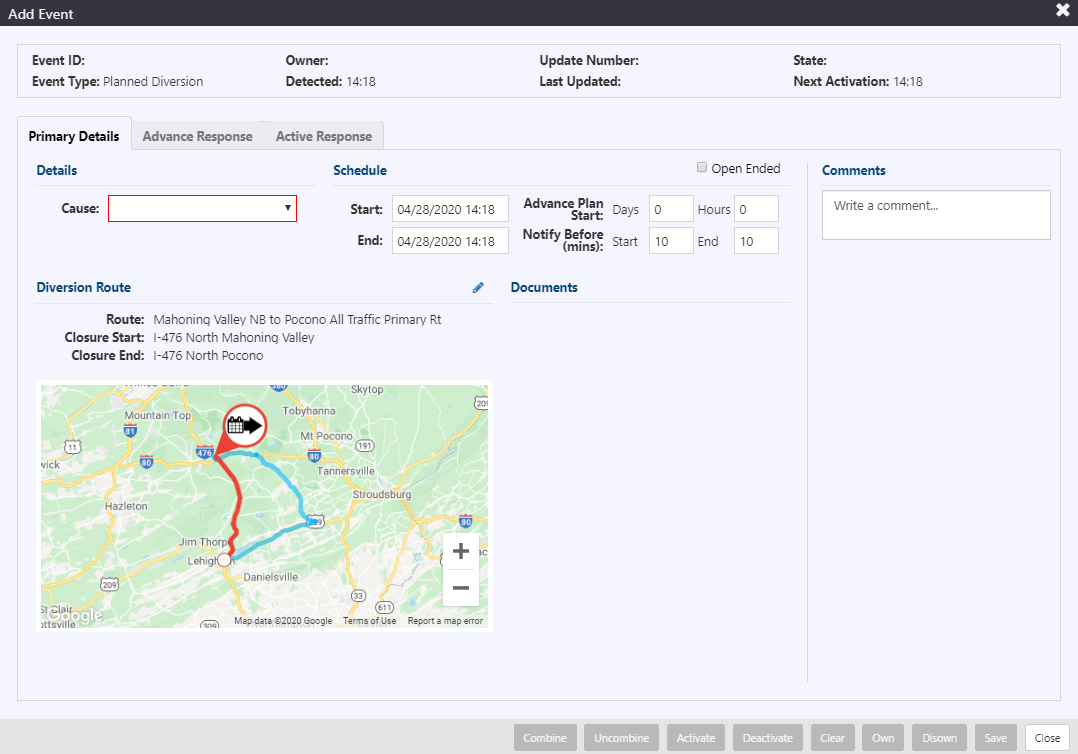
Include the following information within the Details area of the Primary Details tab:
- Cause: the specific cause of the diversion event
- Start: start date and time of the schedule. Clicking in the field will pop open a calendar with time sliders. Select the appropriate date and set the hour/min of the time.
- End: end date and time of the schedule. Clicking in the field will pop open a calendar with time sliders. Select the appropriate date and set the hour/min of the time.
- Open Ended: check this box if there is no planned End date
- Advance Plan Start: there are two fields available : Days and Hours. Type a value in the field representing the time in advance of the planned event activation that an Advance Response plan related to this event be disseminated to devices and other broadcast mediums. If there are no advance warnings, the fields can remain at the default value of 0.
- Notify Before (mins): indicate the number of minutes prior to be notified of the start or end of weather event.note
This field does not apply to advance warnings.
Click the Save button located at the bottom of the Event Details window. The diversion event record will be created. The header of the Event Details window will update to include Event ID, Owner, Update Number and Last Updated time.
Advance Warning
At the start of the Advance Response period the diversion event icon will flash on the map and a medium priority notification will be generated in the notification tray. Advance Response can be accepted by navigating to the Event Details view two ways:
Right-click the event icon and click Details. Event Details window will be shown. Click the Advance Response tab. Advance warning response messages shown.
Click View Plan in the notification. Advance warning response messages in Advance Response tab shown.
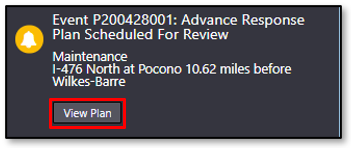
The notification will be removed from the notification tray once all tabs of response are viewed. For accepting the system suggested response, see section 17.19 for more details. Response plan will be generated and available for posting, as indicated by a blue banner in the Event Details window and a notification in the notification panel. For more information on response plans, see section Manage Event Response Plan.
Activate a Scheduled Diversion Event
At the start of the event activation period or within the advance notification period (see Notify Before in section Schedule a Planned Diversion Event ), the diversion event icon will flash on the map and a high priority notification will be generated in the notification tray. The event can be activated three ways:
Click Activate in the Event Details window of the weather event. Activate Event confirmation dialogue will appear. Click Continue to activate event.

Response plan will be generated and available for posting, as indicated by a blue banner in the Event Details window and a notification in the notification panel. For more information on response plans, see section Manage Event Response Plan.
Navigate to the event icon via the map controls or through event list. Right-click event icon and click Activate.
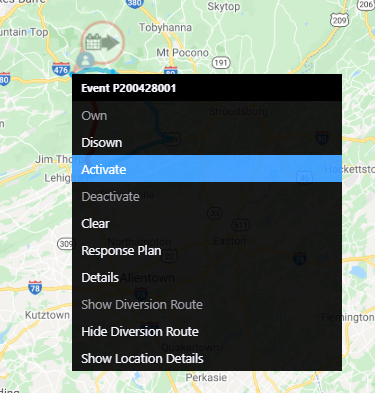
Activate Event confirmation dialogue will appear. Click Continue to activate event.
Response plan will be generated and available for posting, as indicated by a blue banner in the Event Details window and a notification in the notification panel. For more information on response plans, see section Manage Event Response Plan.
View the notification of the event start in the notification panel:
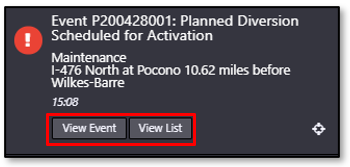
- Click View Event to navigate to the Event Details view. Event can be activated through the Event Details window, as stated above.
- Click View List to navigate to the event list containing the event. Event Details window can be accessed via the list. For more information on event lists, see section View List of Events. Event can be activated through the Event Details window, as stated above.
- Click
to zoom to the diversion event icon on the map. Event can be activated through the Event Details window or right-clicking on the icon, as stated above.
Activate Event confirmation dialogue will appear. Click Continue to activate event. The notification requesting event activation will be removed from the tray.
Active response plan will be generated and available for posting, as indicated by a blue banner in the Event Details window and a notification in the notification panel. For more information on response plans, see section Manage Event Response Plan.
:::note
If Advance Response is disseminated, it will remain until it has been replaced by Active Response.
:::
For more information on Advance Response, see section Manage an Advance Plan .
For more information on system notifications, see section Notifications.
Deactivate a Scheduled Diversion Event
At the end of the event activation period or within the advance notification period (see Notify Before in section Schedule a Planned Diversion Event ), the weather event icon will flash on the map and a high priority notification will be generated in the notification tray. The event can be deactivated three ways:
Click Deactivate in the Event Details window of the weather event. Deactivate Event confirmation dialogue will appear. Click Continue to activate event.

Navigate to the event icon via the map controls or through event list. Right-click event icon and click Deactivate.
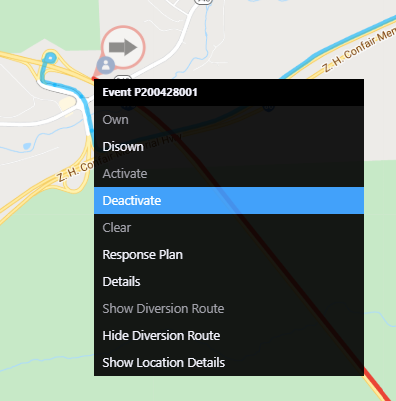
Activate Event confirmation dialogue will appear. Click Continue to activate event.
View the notification of the event end in the notification panel:
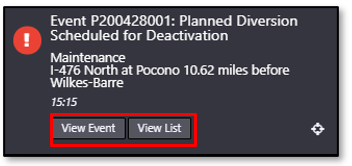
- Click View Event to navigate to the Event Details view. Event can be deactivated through the Event Details window, as stated above.
- Click View List to navigate to the event list containing the event. Event Details window can be accessed via the list. For more information on event lists, see section View List of Events. Event can be deactivated through the Event Details window, as stated above.
- Click
to zoom to the diversion event icon on the map. Event can be deactivated through the Event Details window or right-clicking on the icon, as stated above.
Deactivate Event confirmation dialogue will appear. Click Continue to deactivate event. The notification requesting event deactivation will be removed from the tray.
Deactivating the event will clear the response to devices and there will be no text-based response generated. For more information on response, see section Manage Event Response Plan.
Authorized users will be able to disable or enable a configured Diversion Plan. An enable/disable option and column is on the configuration list. Routes that are disabled will not be provided as an option when declaring a Diversion event.
For more information on system notifications, see section Notifications.