Alerts
Alerts are represented by the on the action panel. You can use the ATMS to:
- Add missing person alert
- Add general alert
Manage Alerts
Alerts are a way to manage response to events across set areas. There are two types of alerts within ATMS:
- General Alerts
- Missing Person Alerts
Missing Persons Alerts are a way of managing response associated with Amber, Silver, Green alerts. The event management structure for alerts are similar to other events in the system, including response plan.
View a List of Active Alerts
To view a list of currently active Alerts in the system, right-click the Alerts icon. In the menu displayed, click on Alerts List.

Alerts List shown.
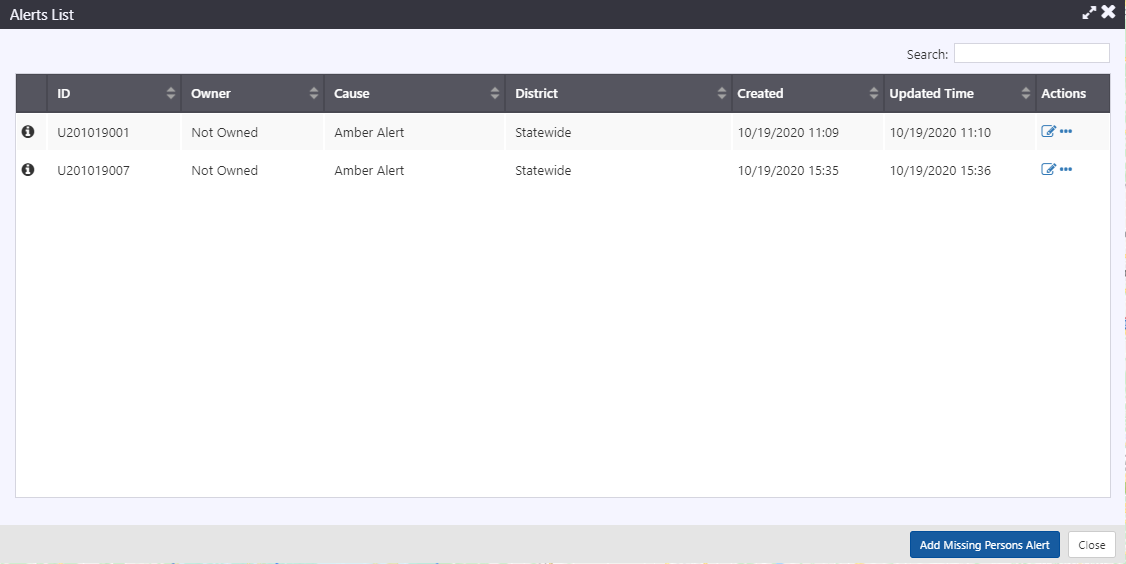
Alerts List columns:
- ID: alert ID
- Owner: alert owner
- Cause: cause of the Alert
- District: districts (if any specific) that the alert applies to
- Created: time the alert was created
- Update Time: last time the alert was updated
- Actions:
Access to Alert Details
Quick access to managing alert ownership, alert clearance or response plan
Create a General Alert
- Right-click the Alerts icon in the Action Panel and click Add General Alert

Alert Details window shown:
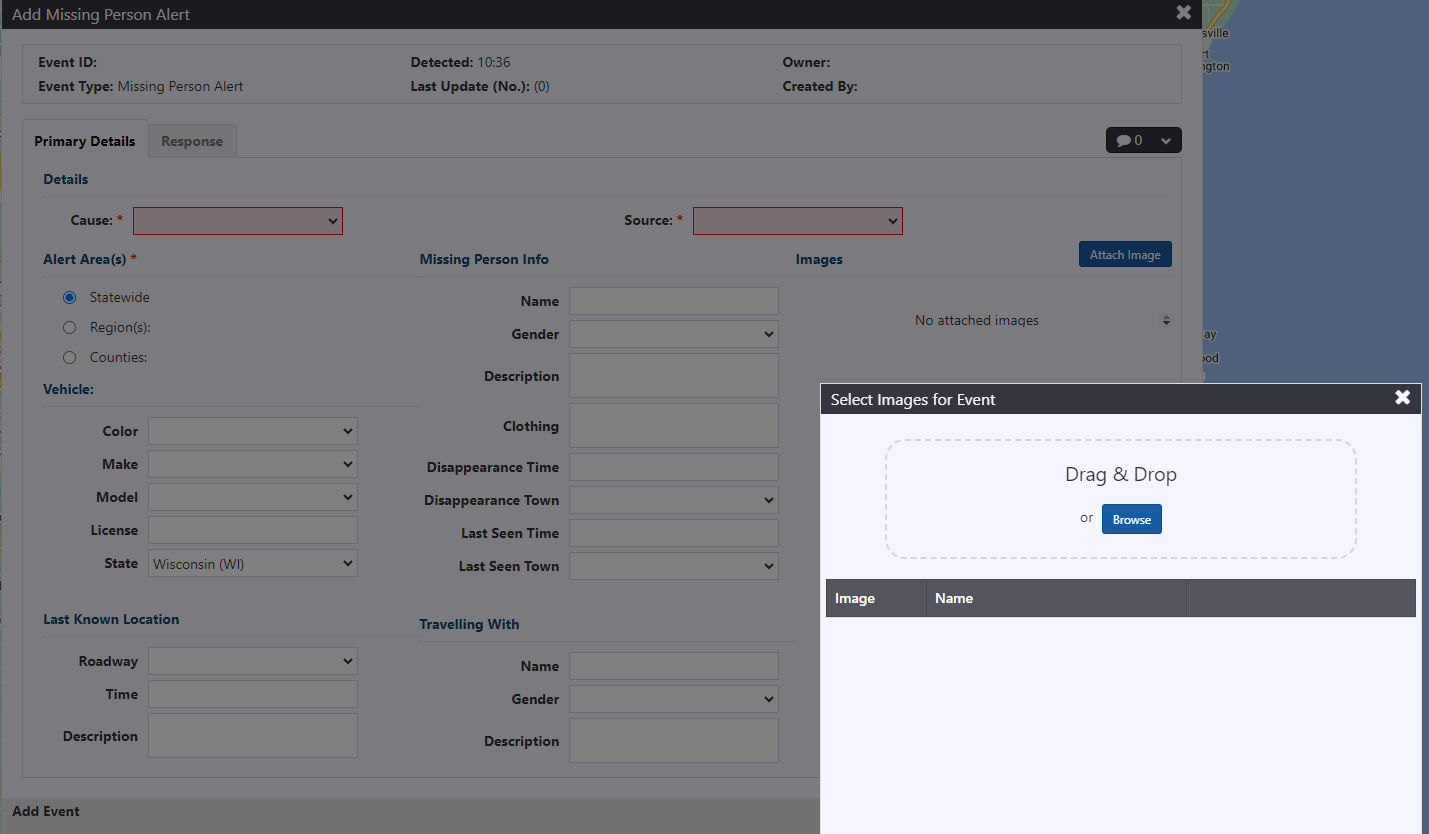
Fill in the alert details in the appropriate format and as they are available.
Details:
- Cause: cause of alert
- Source: source of alert information
District/Region:
- Statewide: click on the radio button to create a statewide alert
- District(s)/Region(s): click on the radio button to create a region-specific alert. A list of Districts/Regions will be shown to select from. One or more districts/regions can be selected.
- Countries: click on the radio button to create a country-specific alert. A list of countries will be shown to select from. One or more countries can be selected
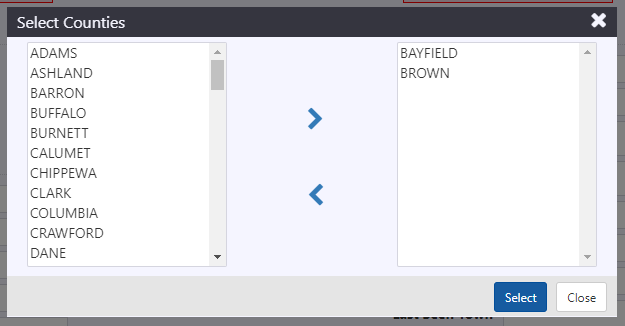
Click Select. The Alert Details view will update to indicate the selected option. Click
to update.
- Description: details attached to the alert for operator's reference.
- Activation:
- Immediate: Only the End and Notify Before fields will be available. The alert will be activated when it is saved.
- Scheduled: The alert will be activated at the time specified in the Start field.
- Start: start date and time of the schedule. Clicking in the field will pop open a calendar with time sliders. Select the appropriate date and set the hour/min of the time.
- End: end date and time of the schedule. Clicking in the field will pop open a calendar with time sliders. Select the appropriate date and set the hour/min of the time.
- Repeat: select No Repeat, if not already selected. See section Repeating Schedule .
- Notify Before (mins): indicate the number of minutes prior to be notified of the start or end of a planned alert occurrence .
Create a Missing Person Alert
- Right-click the Alerts icon in the Action Panel and click Add Mission Person Alert.

Alert Details window shown.
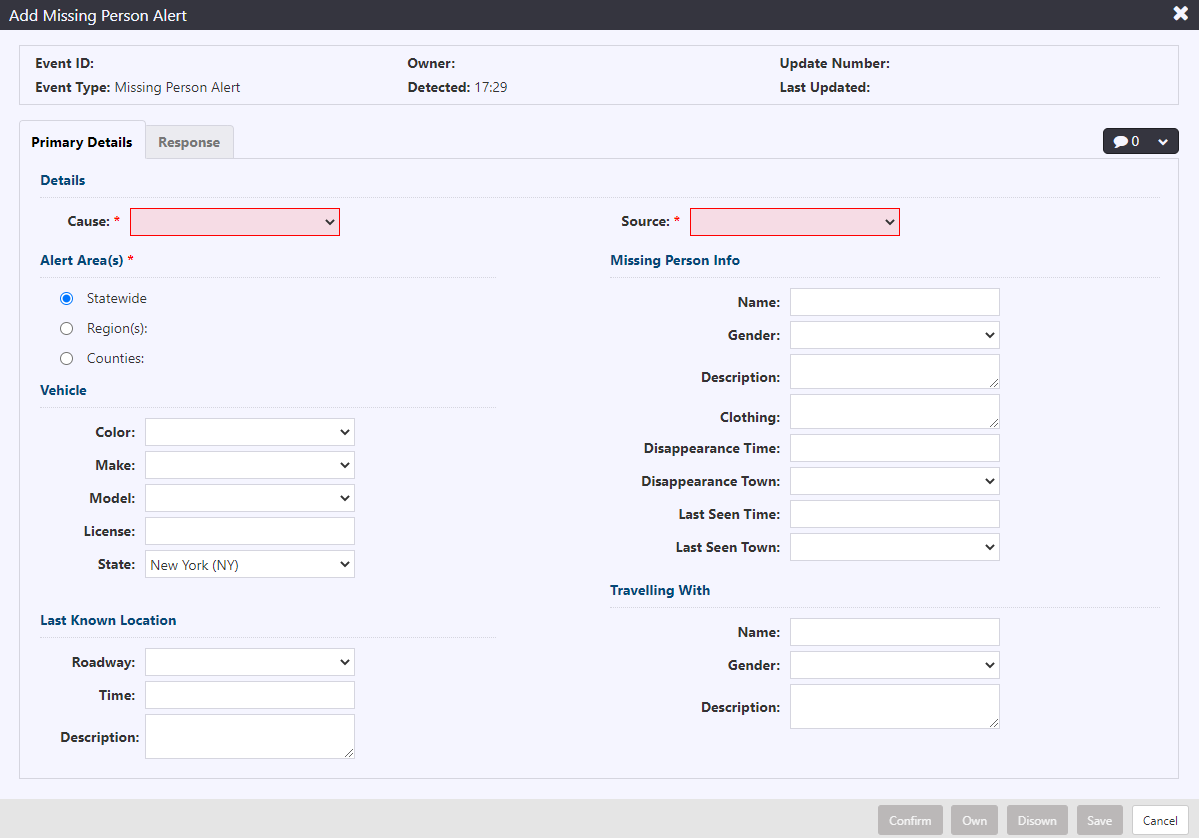
Fill in the alert details in the appropriate format and as they are available.
Details:
- Cause: cause of alert
- Source: source of alert information
District/Region:
- Statewide: click on the radio button to create a statewide alert
- District(s)/Region(s): click on the radio button to create a region-specific alert. A list of Districts/Regions will be shown to select from. One or more districts/regions can be selected.
- Countries: click on the radio button to create a country-specific alert. A list of countries will be shown to select from. One or more countries can be selected.

Click Select. The Alert Details view will update to indicate the selected district(s)/region(s).
Click
to update.
Vehicle:
- Color: color of vehicle
- Make: make of vehicle
- Model: model of vehicle
- License: vehicle license plate number
- State: state the vehicle is registered in
Last Known Location:
- Roadway: roadway the vehicle was last seen on
- Time: time the vehicle was last seen
- Description: full description of the last known location
Missing Person Info:
- Name: name of missing person
- Gender: gender of missing person
- Description: full description of missing person
- Clothing: clothing description of missing person
- Disappearance Time: time the person had disappeared
- Disappearance Town: town the person had disappeared in
- Last Seen Time: time the last time the person was seen
- Last Seen Town: town the person was last seen in
Travelling with:
- Name: name of person traveling with missing person
- Gender: gender of person traveling with missing person
- Description: full description of person traveling with missing person
Comments: comments that apply to this alerts record in the ATMS.
Missing person Image: Clicking the "Attach Image" button will open the "Select Missing Person Image" dialog. As with other image selection options in the user interface, users will be able to Drag and Drop an image or use the Browse button to open up a file manager. Once attached, clicking on the image link will open a preview of the image. Clicking the edit pencil icon button will open the Select Missing Person Image box and allow users to select a different image. The "x" icon button will remove the currently attached image. These images will be available to be attached to supported response media.
Click Save in the Alert detail window. The alert event record will be created. The header of the Event Details window will update to include Event ID, Owner, Update Number and Last Updated time. Response plan will be generated and available for posting, as indicated by a blue banner in the Event Details window and a notification in the notification panel. For more information on response plans, see section Manage Response Plan .
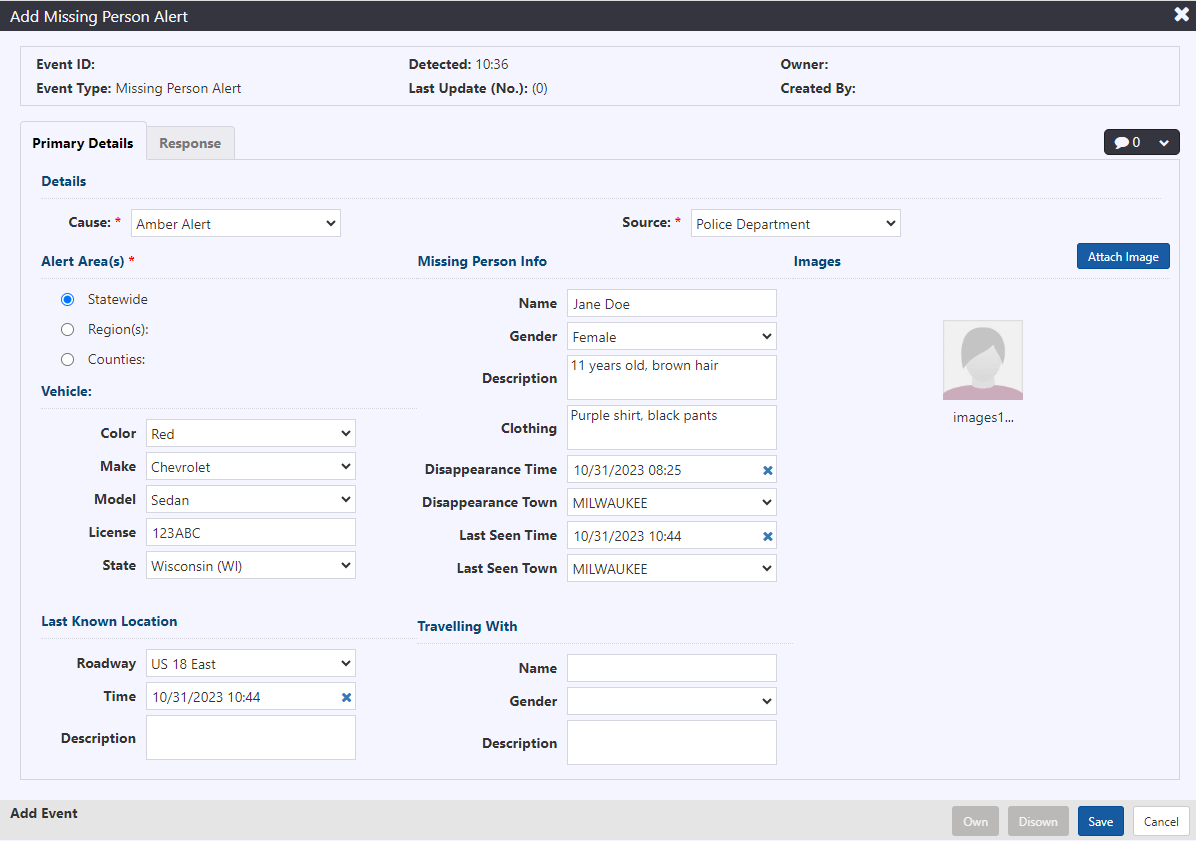
The above information can be populated or updated at any time during the alert management process.
Edit an Alert
To edit an alert, navigate to the Alerts List, as specified in section Alerts List . Click to open the Alert Details window. Alert Details window shown. Fill in or update fields in the Primary Details tab with the new information and click Save. The updates will be applied to the alert record.
The Last Update time in the header will update. Response Plan will update to include any changes that impact the suggested response.