Manage an Unplanned Event
An unplanned event is an event that is unexpected and typically has adverse impacts on the flow of traffic. These are categorized into the following types:
| EVENT ICON | EVENT TYPE |
|---|---|
| Incident Possible causes: crash, debris on roadway, disabled vehicle, fire, hazardous material spill, etc. | |
| Congestion Possible causes: delay, etc. | |
| Wrong Way Driver Possible causes: wrong way driver |
Incidents
To manage an incident, first declare the event on the map, as described in section Add an Event . The Event Details window is shown.
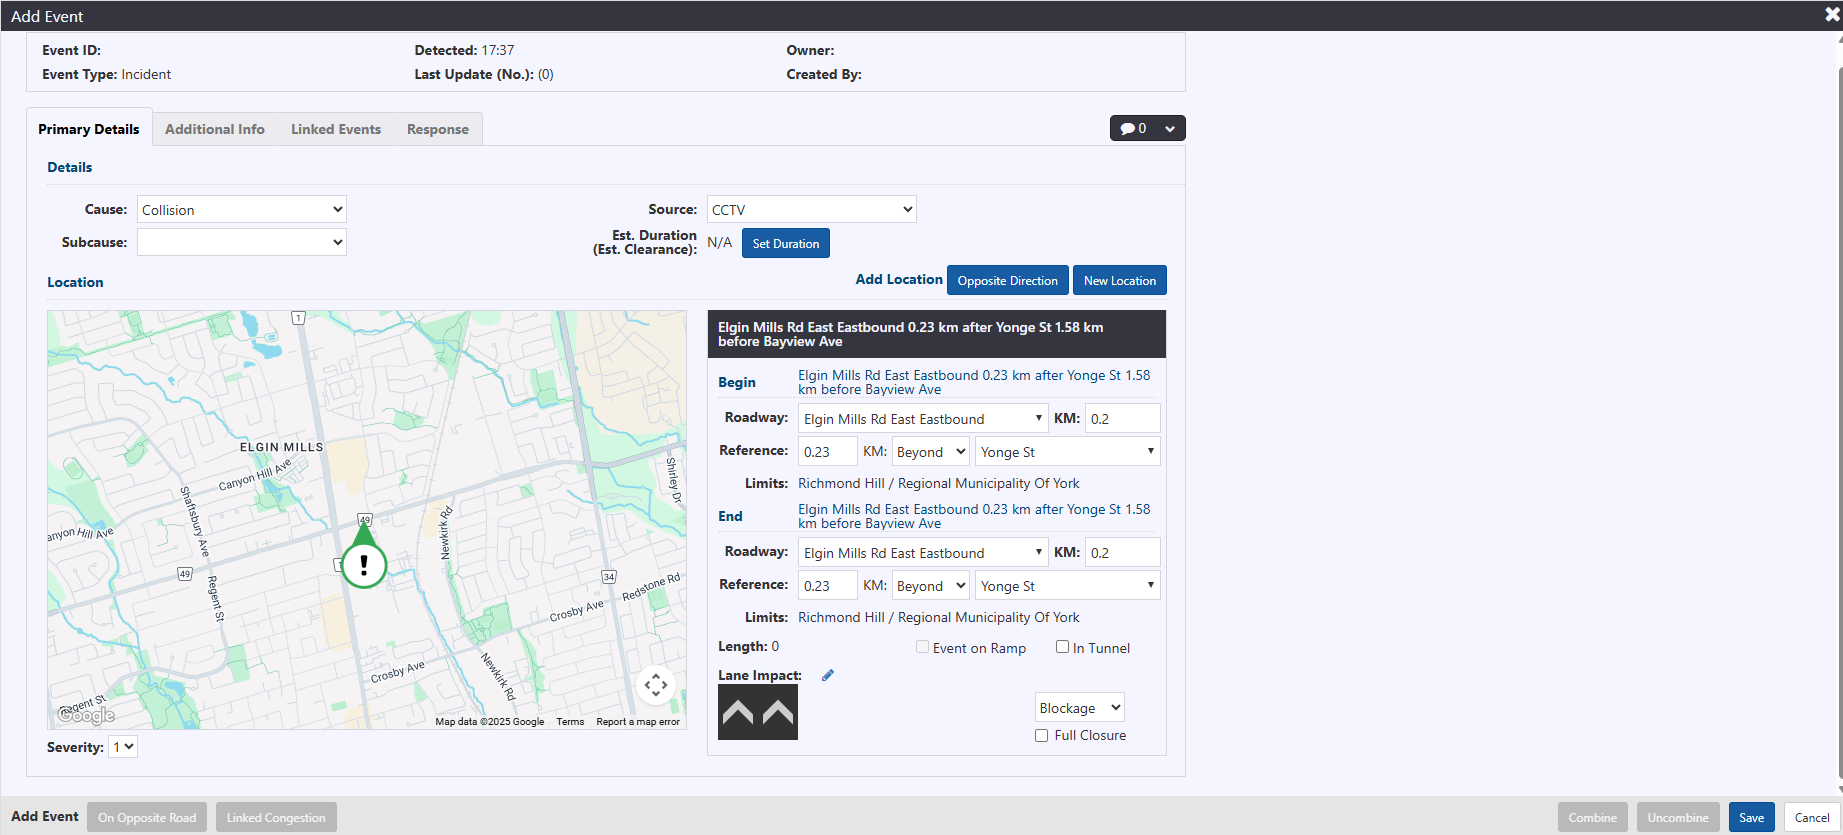
Note: Detected time in the header is the time the event was declared in the ATMS.
Include the following information within the Details area of the Primary Details tab:
- Cause: the specific cause of the incident
- Subcause: the specific subcause that is applicable
- Source: the primary source of incident information
- Duration (hours): estimated incident duration. User can set the duration by clicking Set Duration button.
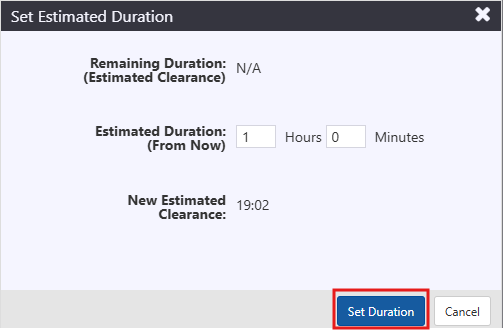

If a user is subscribed to the notification, they will automatically receive it.
The notification duration can be updated by clicking the icon.
Next, set location in the Primary Details tab of Event Details, as described in section Set or Change Event Location . Then set lane blockage pattern in the Primary Details tab of Event Details, as described in section Set or Change Event Location for Weather Events . If the incident is in a workzone, associate the workzone event, as described in section Manage Event in Workzone . Include any comments, if there are any, as described in section Event Comments .
Click the Save button located at the bottom of the Event Details window. The incident event record will be created. The header of the Event Details window will update to include Event ID, Owner, Update Number and Last Updated time.
Response plan will be generated and available for posting, as indicated by a blue banner in the Event Details window and a notification in the notification panel. For more information on response plans, see section Manage Event Response Plan .
Responder Vehicle, Vehicles Involved or road and weather Condition information may be added within the event record through the Additional Info tab. For more detail on the tab, see section Additional Info .
Congestion
To manage a congestion event, first declare the event on the map, as described in section Add an Event . The Event Details window is shown.
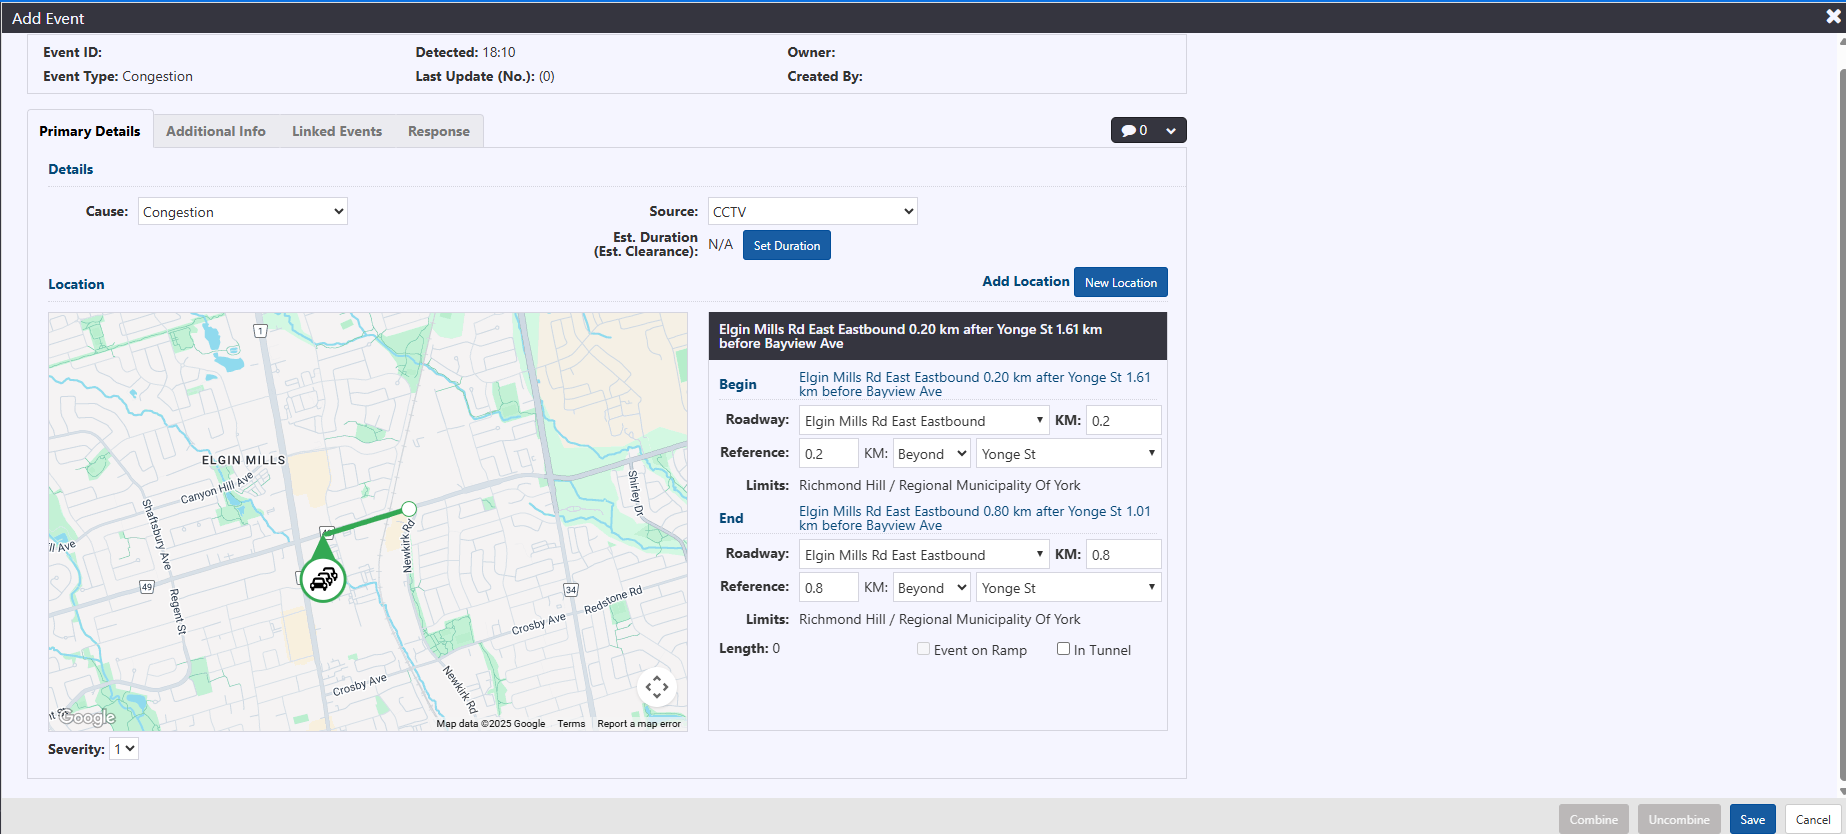
Note: Detected time in the header is the time the event was declared in the ATMS.
Include the following information within the Details area of the Primary Details tab:
- Cause: the specific cause of congestion
- Source: the primary source of congestion information
- Duration (hours): estimated congestion duration
Next, set location in the Primary Details tab of Event Details, as described in section Set or Change Event Location . Include any comments, if there are any, as described in section Event Comments .
Click the Save button located at the bottom of the Event Details window. The congestion event record will be created. The header of the Event Details window will update to include Event ID, Owner, Update Number and Last Updated time.
Response plan will be generated and available for posting, as indicated by a blue banner in the Event Details window and a notification in the notification panel. For more information on response plans, see section Manage Event Response Plan .
Wrong Way Driver
To manage a Wrong Way Driver event, first declare the event on the map, as described in section Add an Event . The Event Details window is shown.
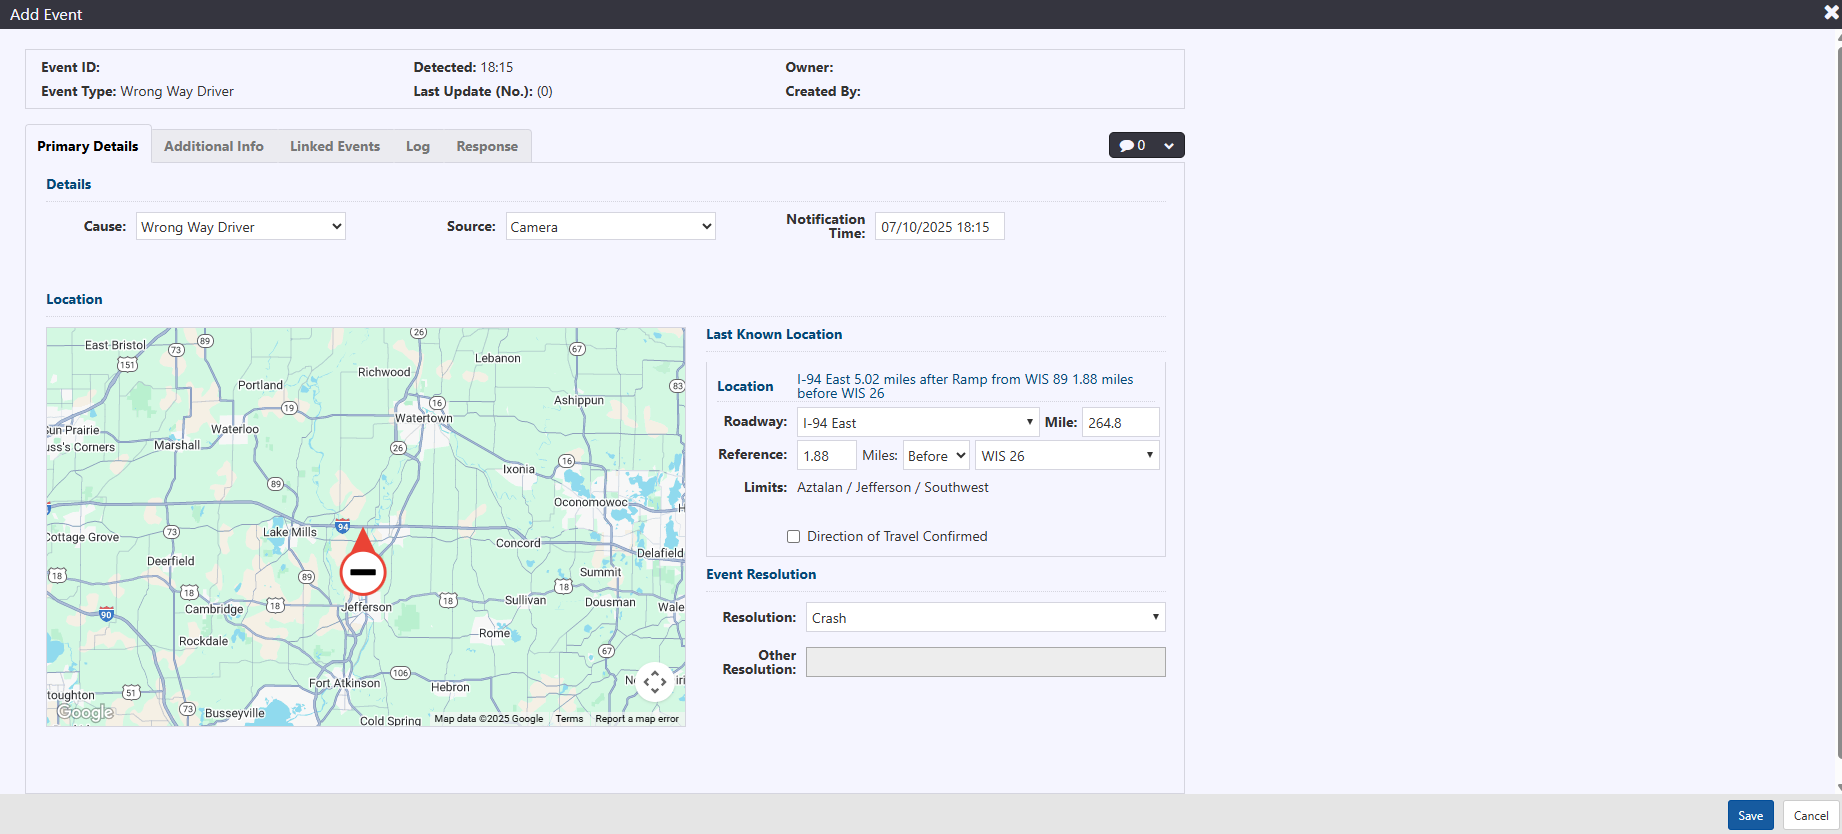
Detected time in the header is the time the event was declared in the ATMS.
Include the following information within the Details area of the Primary Details tab:
- Cause: the specific cause of Wrong Way Driver, which will typically be Wrong Way Driver, unless otherwise configured
- Source: the primary source of Wrong Way Driver information
- Notification Time: time the operations center was notified of the event. A calendar will pop-up to note the time when clicked in the field. By default the time will be the same as the Detected time.
Next, set location in the Primary Details tab of Event Details, as described in section Set or Change Event Location . Some unique location specific features for Wrong Way Driver event type are:
- No Head and Tail location differentiation as the event is always at a point location
- A checkbox for indicating whether the location of the wrong way driver is known
Include any comments, if there are any, as described in section Event Comments.
Click the Save button located at the bottom of the Event Details window. The Wrong Way Driver event record will be created. The header of the Event Details window will update to include Event ID, Owner, Update Number and Last Updated time.
Response plan will be generated and available for posting, as indicated by a blue banner in the Event Details window and a notification in the notification panel. For more information on response plans, see section Manage Event Response Plan .
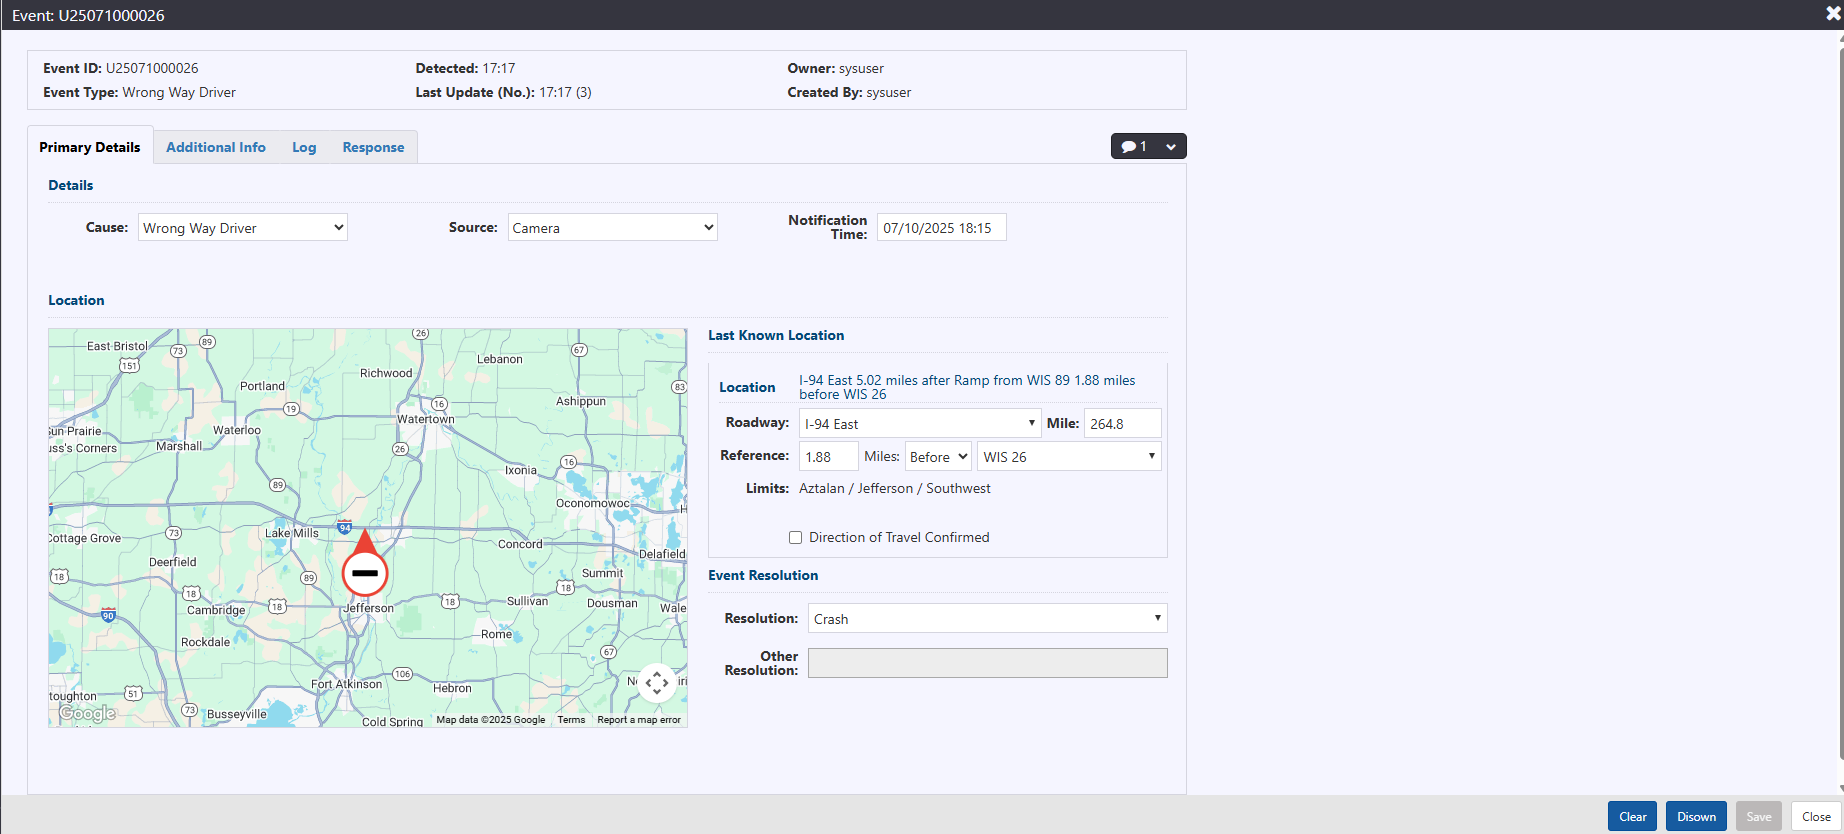
The above information can be populated or updated at any time during the Wrong Way Driver management process.
Responder Vehicle, Vehicles Involved or road and weather Condition information may be added within the event record through the Additional Info tab. For more detail on the tab, see section Additional Info .
Clear an Event
To clear an Unplanned event, either:
- Click Clear in the Event Details window; or

- Right-click the event icon and click Clear.
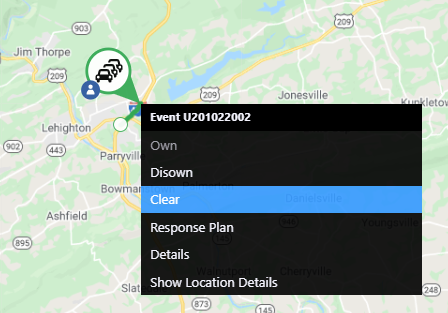
A Clear Event dialogue will be displayed, requesting confirmation of the action. Click Continue.
When an event is cleared, the ATMS automatically removes response messages related to the event from signs and HAR Transmitters.
If there were no e-mail, SMS or API responses accepted/published for the event, it will be removed from the map and event lists immediately. If e-mail, SMS or API responses were accepted for the event, it will remain on the map and in the event list in a Completed state to provide an opportunity to send clearance response plan messages from the event. The event icon will change colour to indicate the new state.
To remove the event from the map and event list once all desired clearance response messages have been sent, either:
- Click Complete in the Event Details window or
- Right-click the event icon and click Complete.