Traffic Detectors
Traffic Detectors are represented along with Traffic Data and Travel Time by the on the action panel. You can use the ATMS to:
- View current data from traffic detectors
- Enable/disable traffic detectors
- View virtual detection stations (VDS), abstracted from traffic detectors
Turn the Traffic Detectors Layer On or Off
To turn the traffic detectors layer on or off, click the on the action panel. When the HAR layer is displayed, the icon is highlighted.
Traffic Detector Icons
The traffic detector icons indicate the status of each traffic detector. The traffic detector icons you will see are as follows:
| ICON | DESCRIPTION |
|---|---|
| Green: A green diamond indicates the traffic detector is enabled and communicating. | |
| Error: A red diamond indicates the traffic detector is not communicating or has an error preventing the ATMS from retrieving any data. | |
| Disabled: A grey diamond indicates the traffic detector has been disabled by a user. The ATMS will not communicate with a traffic detector while it is disabled, and will have no information from the traffic detector. |
View the Traffic Detector List
To open a list of all traffic detectors configured in the ATMS, right click on the Traffic Detector icon on the action panel and select the Traffic Detector List option.
The traffic detector list indicates the status of each traffic detector
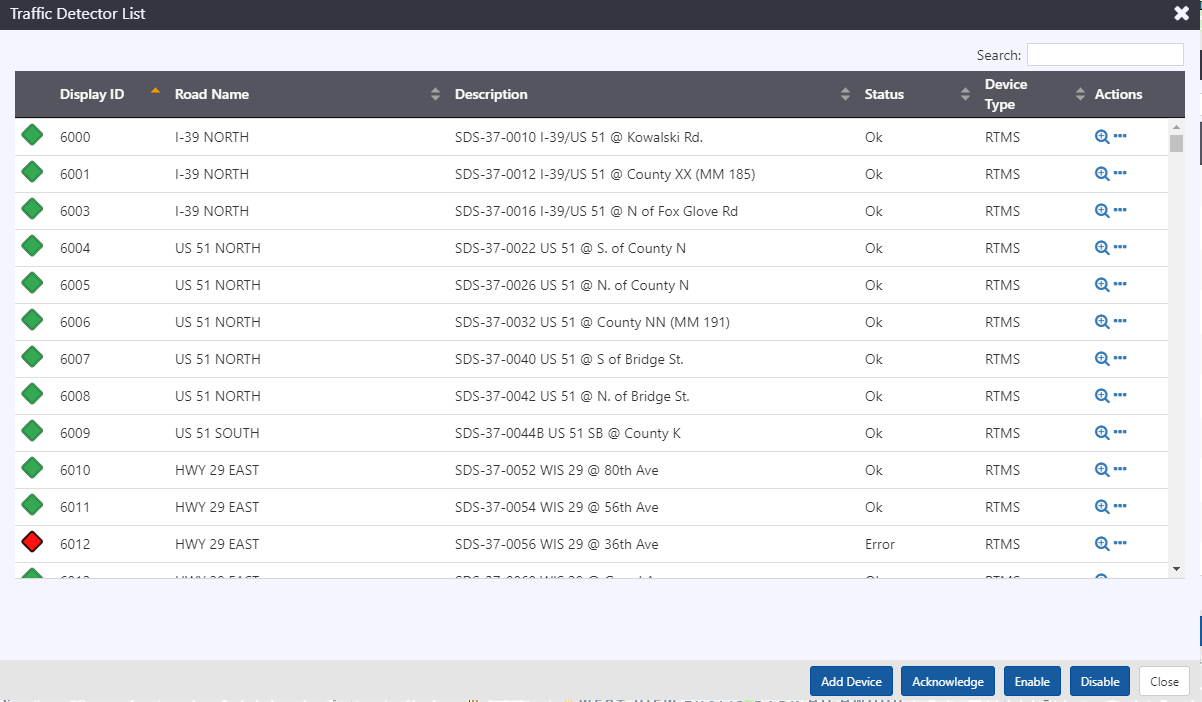
Each row contains a set of buttons that can be used to manage the controller.
| BUTTON | ACTION |
|---|---|
| Center the map on the transmitter | |
Open Menu with options to
|
Search for a Transmitter
You can search the traffic detector list using the Search box at the top right of the window. See section Search a List for more details.
Sort the Transmitter List
You can sort the list by the icons in its header. See section Sort a List for more details.
View a Traffic Detector
Click on the map icon for a traffic detector to open a window showing the current data from the detector. The window is tethered to the rest area icon it belongs to.
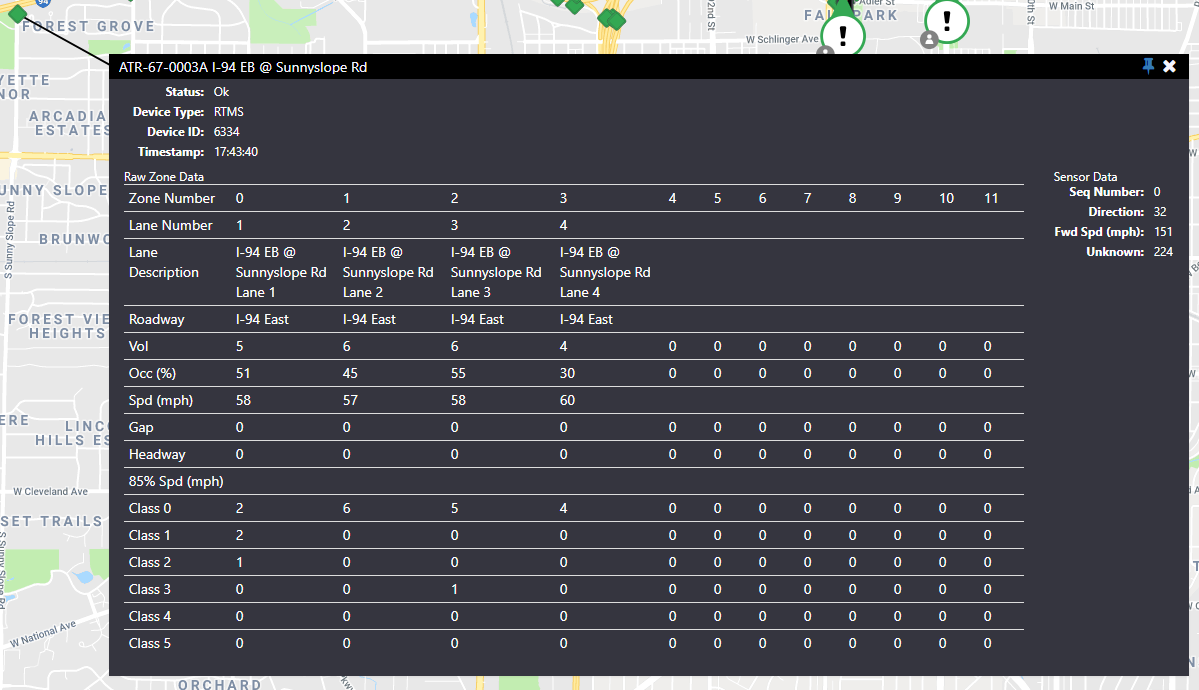
Click the /
icon to pin or unpin the window on the map. If the pin is pointing down, the window will stay in a fixed position on your screen as you pan the map. If the pin is pointing to the side, the window will move with the map.
Click the icon to close the window.
Click and drag on the window title to reposition the window.
This window updates automatically whenever the traffic detector's current data or status changes.
Enable or Disable a Traffic Detector
When a traffic detector is Disabled, the ATMS stops communicating with it, and the ATMS will not check the status of the traffic detector. The traffic detector icon updates to indicate the sign is disabled.
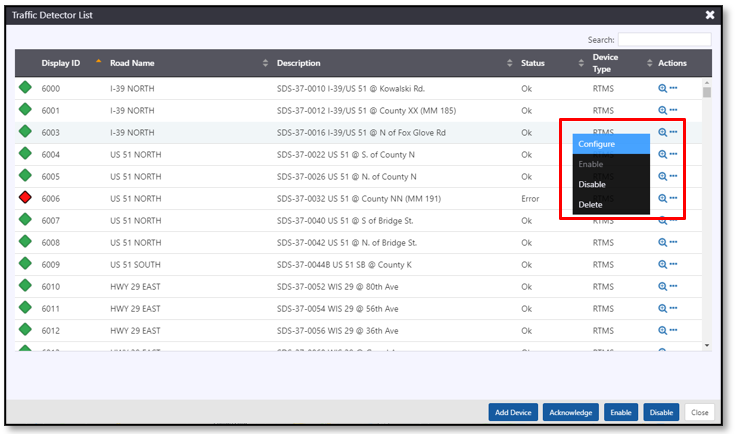
You can Enable or Disable a traffic detector from its entry in the Traffic Detectors List. Open the Traffic Detectors List and find the desired traffic detector. Click on the button to open the menu for that traffic detector. Only one of the Enable or Disable menu options will be active and the other will be grey/inactive, based on the current state of the sign. Click on the Enable or Disable menu option to turn the meter on or off in ATMS.
Enable or Disable Multiple Traffic Detectors
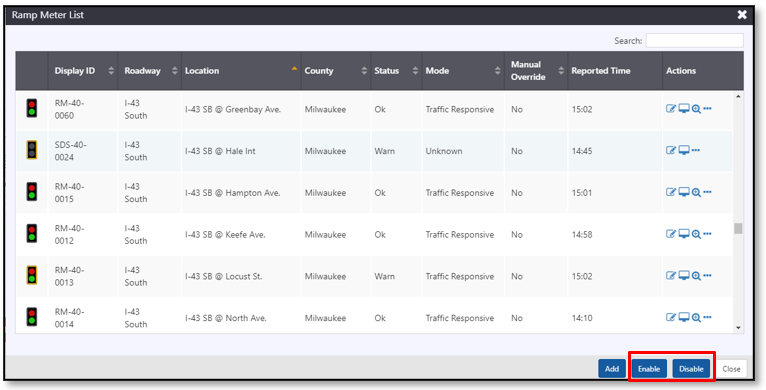
You can Enable or Disable multiple traffic detectors using the buttons at the bottom of the Traffic Detectors List. Use the Search box to (optionally) filter the list to the set of traffic detectors to be enabled or disabled. The Enable button at the bottom of the list view will be active if any of the traffic detectors displayed in the list (based on your search) are disabled. The Disable button at the bottom of the list view will be active if any of the traffic detectors displayed in the list are enabled. Click Enable or Disable to turn all of the traffic detectors displayed in the list on or off in ATMS.
Turn the VDS Layer On or Off
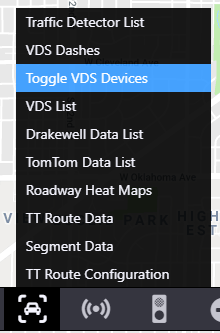
To turn the VDS layer on or off, right-click the on the action panel and select the Toggle VDS Devices option.
VDS Icons
The VDS icons indicate the location of each VDS. All VDS are represented as blue squares.
View the VDS List
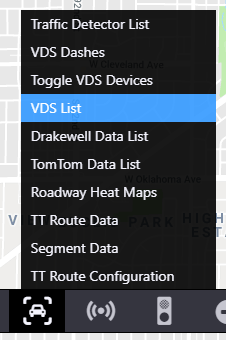
To open a list of all VDS configured in the ATMS, right click on the VDS icon on the action panel and select the VDS List option.
The VDS list identifies all VDS.
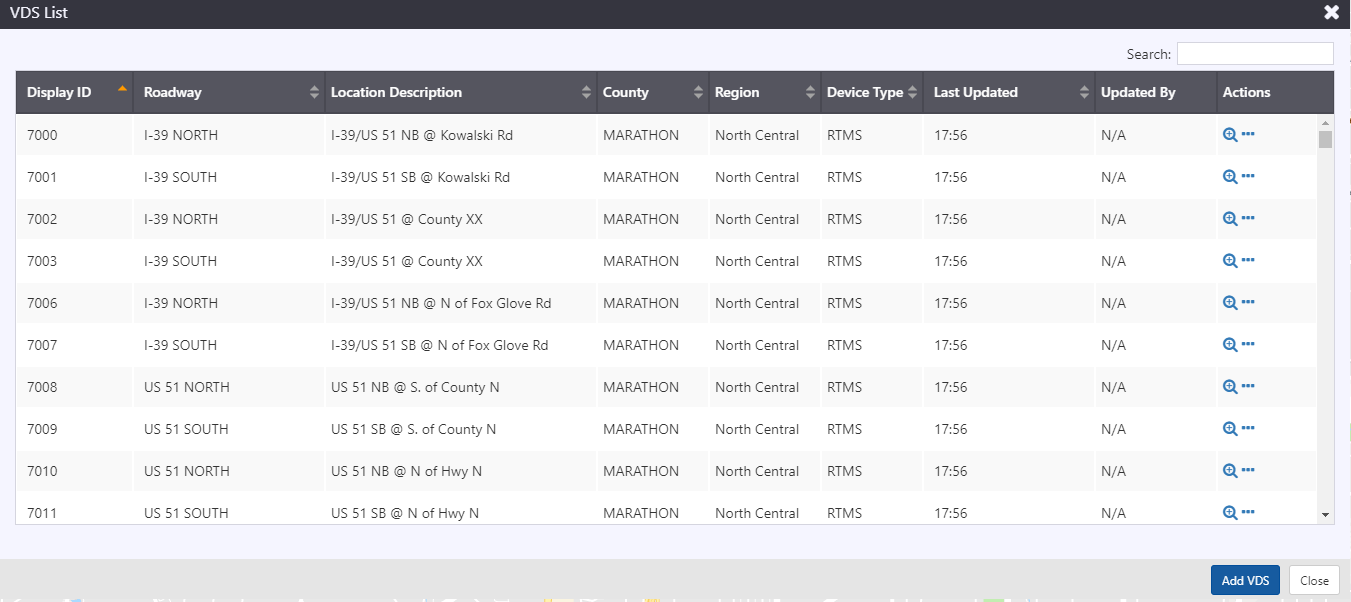
Each row contains a set of buttons that can be used to manage the VDS.
| BUTTON | ACTION |
|---|---|
| Center the map on the transmitter | |
Open Menu with options to
|
Search for a VDS
You can search the Transmitter list using the Search box at the top right of the window. See section Search a List for more details.
Sort the VDS List
You can sort the list by the icons in its header. See section Sort a List for more details.
View a VDS
Click on the map icon for a VDS to open a window showing the current data for the VDS. The window is tethered to the rest area icon it belongs to.
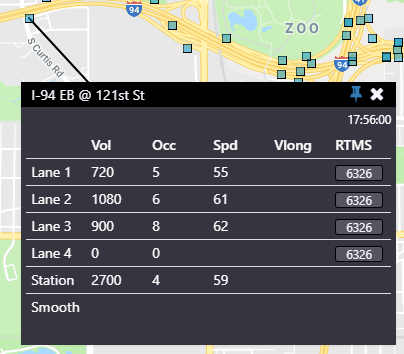
Click the /
icon to pin or unpin the window on the map. If the pin is pointing down, the window will stay in a fixed position on your screen as you pan the map. If the pin is pointing to the side, the window will move with the map.
Click the icon to close the window.
Click and drag on the window title to reposition the window.
This window updates automatically whenever the VDS's current data or status changes.
Bluetooth Sites
Bluetooth Sites are accessed through the Traffic Data section. They can be seen by clicking on from the action panel. You can use the ATMS to:
- Disable a Bluetooth Reader
- View device comments for a Bluetooth Site
- View properties for a Bluetooth Site
Turn the Traffic Layer On or Off
To turn the traffic data layer on or off, click the on the action panel. When the traffic layer is displayed, the icon is highlighted.

Bluetooth Site Icons
The bluetooth icons indicate whether or not the it is available for use:
| ICON | DESCRIPTION |
|---|---|
| ! | Operational: The Bluetooth Site is operating properly and available for use within the ATMS. |
| Disabled: The Bluetooth Site is not available for use within the ATMS. | |
| Error: The Bluetooth Site is in an error state that may affect its connectivity or performance within the ATMS. |
View the Bluetooth Site List
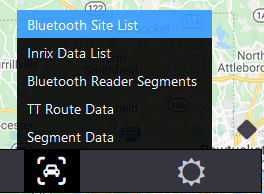
Set Bluetooth Filter
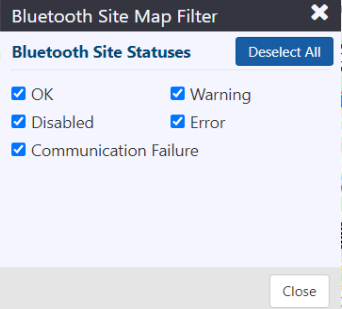
Set Bluetooth Filter allows for filtering Bluetooth Sites that are displayed in the current map view. To access the Set Bluetooth Filter, right click on the icon on the Action Panel and select Set Bluetooth Filter.
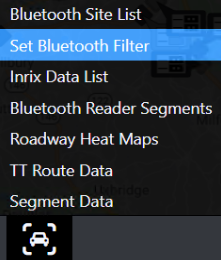
Bluetooth Site Map Filter allows for filtering Bluetooth Sites displayed in the current map view, based on Bluetooth Site Status. Sites can be selected for display by clicking desired Bluetooth site status check boxes . Bluetooth Site status options include OK, Disabled, Communication Failure, Warning, and Error.
When Bluetooth Site Map Filter is applied, Traffic Data icon will show a small orange filter.
Manage a Bluetooth Site
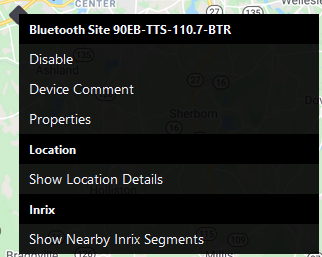
Right-click a Bluetooth Site on the map to see
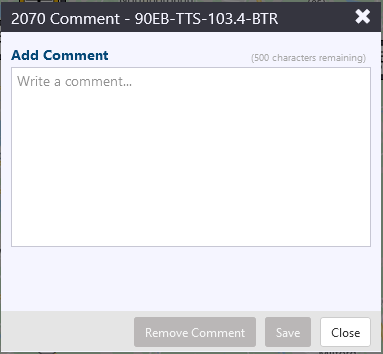
Bluetooth Site Comments
Select Device Comment to add a comment for the Bluetooth Reader at the associated Site.
Bluetooth Site Properties
Select Properties to view the Bluetooth Site Properties window.
Select Disable/Enable to Disable or Enable the Bluetooth site device.
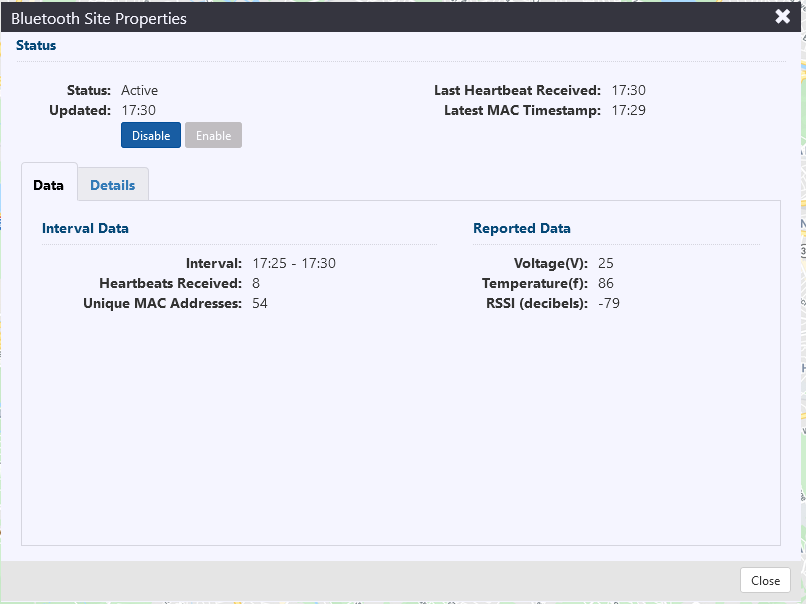
In the Bluetooth Site Properties window, the Data tab displays:
- Interval: The period of time between which Heartbeats and Unique MAC Addresses are recorded.
- Heartbeats Received: Status information from the Bluetooth Reader regarding critical system information such as Voltage, Temperature, and RSSI.
- Unique MAC Addresses: The amount of unique MAC addresses recorded by the Bluetooth reader. This essentially translates to individual car traversals.
- Voltage (V): The current reported voltage of the battery on site for the Bluetooth reader, in Volts.
- Temperature (f): The current reported temperature of the Bluetooth reader, in degrees Fahrenheit.
- RSSI (decibels): The current signal strength of the Bluetooth Reader.
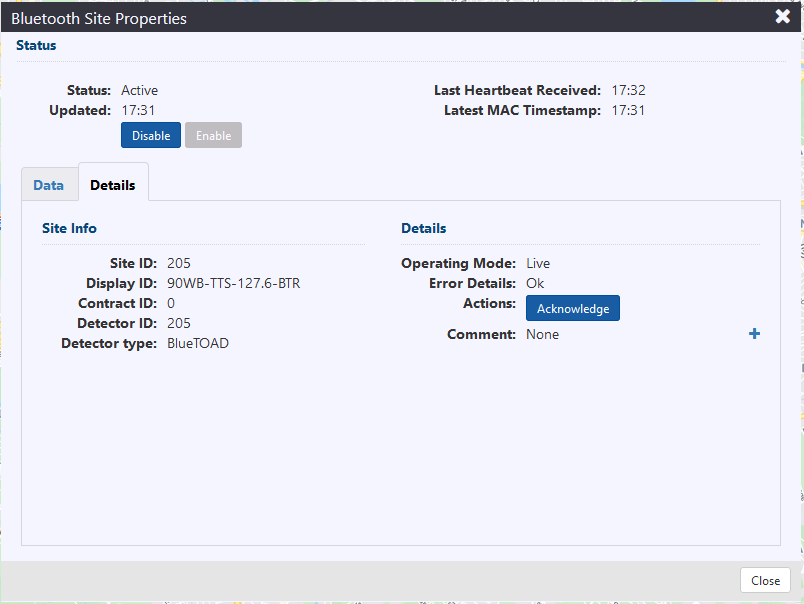
In the Bluetooth Site Properties window, the Details tab displays:
- Site ID: The ATMS system's ID number for the site.
- Display ID: The location name of the site, followed by 'BTR'.
- Contract ID: The contract number associated with the device.
- Detector ID: The unique identifier number for the Bluetooth detector, found physically on the device.
- Detector Type: The type of detector located at the site.
- Operating Mode: This defines if the device is Simulated or Live in the ATMS system.
- Error Details: Any details pertaining to the solar controller's errors, if there are any. This will say 'OK' if there are no errors.
- Actions: Select Acknowledge to acknowledge any alarms associated with the Bluetooth Device.
- Comment: Any added comments are shown here. Select
to add a new comment.
Disable a Bluetooth Site
The Disable button can be found by right-clicking on the Bluetooth Site icon from the map, or through the Details button in the Bluetooth Site list.
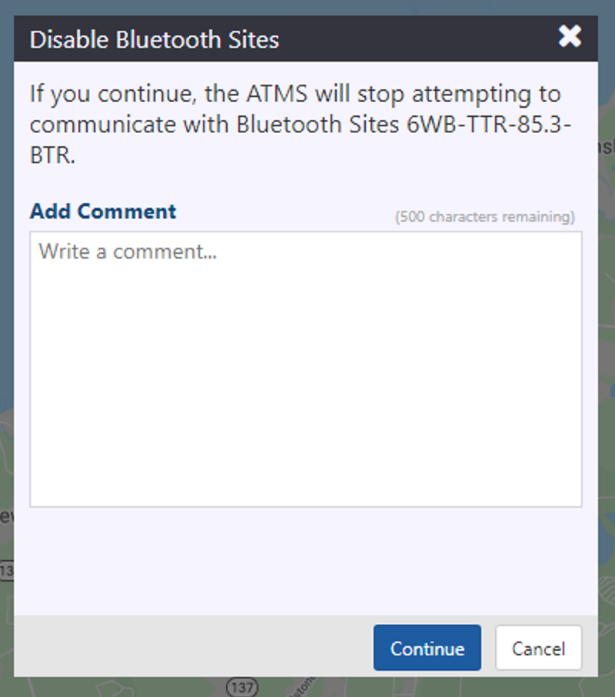
Clicking Disable opens the Disable Bluetooth Sites window, which provides a warning that the ATMS system will stop communicating with the site if the user continues.
There is space to add a comment providing why the user is disabling the Bluetooth Site.
Clicking Continue will confirm and disable, while clicking Cancel will close the window without disabling.
Once disabled, the site icon will be greyed out.
Enable a Bluetooth Site
When a site is disabled, the Enable button appears where Disable would normally appear. This is found by right-clicking a Bluetooth Site or by clicking the Details button through the Bluetooth Site list window.
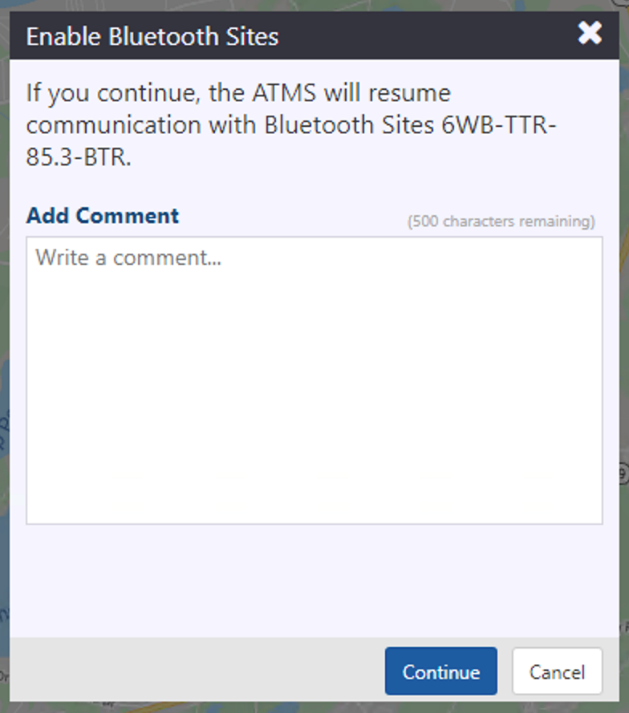
Click Enable to enable a disabled site, then the Enable Bluetooth Sites window will open. The window provides a warning that enabling the device will cause the ATMS to resume communication with the site.
There is space to add a comment providing why the user is enabling the Bluetooth Site.
Clicking Continue will confirm and enable, while clicking Cancel will close the window without enabling.
Once enabled, the site icon will no longer be greyed out.
